In the spirit of the holidays, here's an incredible cookie recipe. Seriously, I LOVE these cookies. There's not a lot of stuff that I eat and immediately fall in love with. When I smelled them baking, I thought someone was baking a homemade pie. They have such a great (but pleasantly MILD) spice essence. They're NOT like ginger snaps. They're much more mellow. They're like sugar cookies with a Christmas-y twist. And the best part is, when I made the recipe at home, it came out just as good (no offense, Carrie - it was your baking of these that inspired me)! And the recipe is really quite easy. You MUST try them....
MOLASSES COOKIES
Note - this recipe card came with the "history" of the recipe, so I feel like I should include that here...in honor of those who made this recipe what it is and were kind enough to share it with future bakers: (Liz McFaul)->Mary Underwood->Carrie Valentine->Kat Michaels
Ingredients:
1 cup sugar plus more for rolling
¾ cup shortening
1 egg
4 Tbsp molasses
2 tsp baking soda
½ tsp salt
1 tsp cinnamon
1 tsp ginger
1 tsp cloves
Directions:
Using an electric mixer, first mix all ingredients except flour, then add in flour and mix a bit more (doesn’t take much mixing…probably about a minute, but I don’t suppose it would hurt to mix more – as long as all the ingredients are well combined). Place a couple of Tablespoons (or more) sugar on a small plate. Take the dough, and make into balls (about rounded Tablespoon sized). Roll each ball in sugar and place into a bowl. Chill the dough balls for about an hour (this prevents the cookies from coming out really flat).Then bake in a 350 degree oven for 10 to 15 minutes (my oven is pretty accurate and it took 15). This recipe made 28 cookies for me, but of course, it depends on how big you make the dough balls.
Saturday, November 22, 2008
Wednesday, November 19, 2008
Chunky Tomato Chicken Soup
Is it cold where you are? Well, it's...."cold".....here in LA (I had to put that in quotes because I realize it's extremely subjective). For us wimps on the left coast, it's a bit colder than it was a few weeks ago, so I guess we can call that fall. Anyhow, if it's at all cold where you are, then you'll really enjoy this one. Warning - it's a bit spicy. You can forgo or greatly reduce the chili powder if you don't like spice. And you can thank Julz for this one - she's my artsy, craftsy, cooking-ey, baking-ey friend.
CHUNKY TOMATO CHICKEN SOUP
Description:
Shredded chicken is added to a soup that combines canned tomatoes, tomato paste, black beans, and green chilies in a well-seasoned chicken broth. (It's basically a cross between chicken soup and chili).
Ingredients
1 pound boneless, skinless chicken breasts
Nonstick cooking spray
1 medium onion, chopped
3 cloves garlic, minced (I used a lot more (like 6 large cloves) because I like it. Tasted good to me!)
4 cups chicken broth (32 ounces, which is usually the size of a carton at the store)
Two 14 oz cans diced tomatoes
One 14 oz can black beans, drained and rinsed
One 6 oz can tomato paste
One 4 oz can diced green chilies (I got Ortega fire roasted mild. Use whatever kind you find - it's loose)
1 tsp chili powder (I used "Arbol" chili powder from the Mexican market. Julz used Cayenne pepper. Either way, I think it turned out quite spicy, so if you're not into spicy, either skip this ingredient, or just put a little dash)
1 tbsp ground cumin, or to taste
1 tsp white pepper (Whatever. I just used regular pepper. I'm not sure of the difference)
1 tbsp basil, dried (I used fresh, since I have a plant. In this case, I think the dried might be a better choice. With fresh, you have to use 3 times as much (literally - that's the conversion rate), and I don't think that in a soup, it really makes a difference).
1 tsp kosher salt (Again, a big "whatever" here. I used regular salt)
1/2 cup chopped fresh cilantro (this may be the last ingredient, but it REALLY adds a lot of yummy flavor, so don't skip it!)
Instructions:
Lightly spray a nonstick skillet with cooking spray. Cook chicken breasts until no pink remains. Remove chicken from pan and set aside to cool. Add onion and garlic to pan and cook just until onions start to sweat (I would cook them longer. I found that even after the recipe was totally done, the onions were not entirely soft. I don't like crunchy onions in my soup, so I would just go ahead and cook them until they're translucent, which will make them softer); remove from heat. In large stock pot combine onions, garlic, chicken broth, tomatoes, black beans, tomato paste, green chilies, chili powder, cumin, white pepper and salt. (The instructions seem to have left out the basil, so I went ahead and added it here with all the other ingredients. I'm not sure if that's the right time to add it, since the flavor cooks out of herbs so easily. It tasted good, so I guess the timing was okay). Stir well. Bring to a boil. Shred chicken into bite sized pieces and add to soup. Reduce heat to low and simmer for 15 minutes then turn off heat. Stir in fresh cilantro before serving. (I just stirred the fresh cilantro into the individual serving bowls. Really adds a great fresh flavor).
I served this soup with big chunky bread and butter. It definitely needs some sort of carbohydrate to go with it, in my opinion. You could also put some Fritos Corn Chips on it (my friend Mary makes a great "Taco Soup" that uses Fritos on top).
So, bundle up and enjoy this hot (in every sense of the word) soup! Farewell from frigid Southern California. ;-)
Saturday, November 8, 2008
Learning By Osmosis?
Well, I'm still no expert, but I have to say, I've had a couple of "fly-by-the-seat-of-my-pants" cooking sessions lately and they both turned out great! And, some old classics that I was never good at have started to suddenly come out right. I'm thinking maybe all that watching of the Food Network has left some random knowledge in my brain.
So my latest exciting experiment that TOTALLY worked out was soup. Yes, soup - seems easy - seems boring - but it's NOT. It's always been an enigma to me. I'm just not a soup maker. I did make that tomato basil bisque a few months ago, but that was strictly following a recipe. And I think of bisque more like it's own category - as opposed to soup. I think of soup as liquid, vegetables, maybe some kind of grain or beans or something, and maybe some protein. I have never made soup, for whatever reason. It turned out SOOOO yummy - I was totally surprised, since I really didn't have any idea what I was doing. It was hot and savory, thick and chunky with veggies, and with a little parmesan grated over the top, it was DELICIOSO!
It all started because I had all these vegetables that I wanted to use up before they went bad - and I also had an opened container of chicken broth, which also needed to be used up. I didn't have onions, which would have been nice, but I did have garlic (always easy to keep around the house, because it lasts forever). So here's what I did ... mind you, I can hardly call it a true "recipe", since there aren't amounts, but consider it a guide.
Vegetable Soup with Orzo (all amounts are really approximate):
Into a large soup pot, I put 2 VERY large cloves of crushed garlic (probably the equvalent of at least 4 regular sized cloves). I added 3 Tbsp butter and melted it over very low heat, stirring constantly (garlic burns so easily). I added about 3 Tbsp (maybe a little more) of all purpose flour and stirred the mixture constantly while still over a low flame. Even though the flame was low, the mixture was sizzling pretty good the whole time (probably because the pot I used is fairly thin-bottomed. After about 3 minutes, I started adding the chicken broth (NOTE: I really don't have any idea how much chicken broth I used, but it doesn't really matter anyway. It depends on how chunky or liquidy or prefer your soup to be). So, I added the broth a little at a time, and mixing it in with the roux (FYI - roux is the flour/butter (and in this case, also garlic) mixture)). Once the mixture is all liquid, just pour the rest of the broth in.
Now for the veggies. I added what veggies I had (any number of veggies would work). I added 2 large carrots (sliced medium thick), celery (sliced pretty chunky - and you can also add the celery leaves...they add flavor), and a crown of brocolli (cut up into large bites). At this point, you should turn the heat up to high to heat up the liquid. I decided at this point that I should add some sort of grain or pasta, so I poured in a little orzo (about 1/3 cup, I think). Remember, orzo is pasta and it expands, so you don't need a ton of it. You're not making an "orzo dish". You just want a bit of pasta in your soup to add texture and substance. I also didn't feel like I had enough liquid in the pot, so I added about 2 or 3 cups of water. Stir as needed to mix up all the ingredients. You should be over high heat at this point to get the liquids hot again.
Flavoring - it's totally up to your taste, but I added some garlic salt, the crumbs on the bottom of my "Bay Leaf" spice jar, dried parsley, salt, pepper, seasoning salt, and a tiny bit of Worchestershire sauce (random, I know - it just struck me as tasty). And, I had some fresh cilantro that I wanted to use up as well, so I threw in about 20 to 30 whole cilantro leaves. Once the mixture boiled, I turned the heat back down to low and put a lid on the pot. I let it simmer for about 20 to 30 minutes.
To serve, you can grate fresh parmesan or other cheese over the top. I also threw some of the fresh cilantro on top. Yummm!
Sunday, November 2, 2008
Roasting chicken, making gravy and the virtues of Jon's Market
Sorry it's been a while, folks. THAT is what happens when you have to go work the 9 to 5. I did a 3 week stint in an office, to help pay the bills. But now I am free once again, and I'm back to cooking and baking. I did the usual weekly bran muffin thing, which is always yummy and totally convenient (I freeze most of them and just take one out the night before I think we'll eat it.) And, last night I roasted a chicken. Sounds not so exciting, but I NEVER do that. I just don't, for whatever reason. But this week, I saw a great deal on whole Foster Farms chickens at Jon's market (I got mine for $3.50 - ridiculous). Anyway, it was good, but the lessons learned from that were:
#1, roasting a chicken is really not worth the trouble (seasoning and generally handling a raw bird). Especially not worth it when you consider that you can get a great cooked chicken at Costco for about 5 or 6 dollars. There's not really that much good, edible meat on a small bird, so why go to the trouble? And the clean up is a lot, too. Anyhow, it was tasty, but not really worth it.
#2, don't trust the cooking times on recipes when it comes to whole birds. It took me an hour longer than the recipe called for (at 75 degrees HIGHER than the recipe called for - it wanted 325, but I knew it would probably take 375 or 400 - and it STILL took a lot longer).
#3, if you choose to put brocolli in with your roasting bird....don't. For whatever reason, it just dries out and gets crispy. The celery, onion and carrot were GREAT - soft and tender, but the brocolli didn't really work that way. I guess it would have been better just to steam some brocolli on the side.
On the bright side, the meal was pretty tasty and my gravy turned out FANTASTIC! It was really easy and for the first time, I feel like I got the right directions and it worked great. Here's the scoop for gravy...
1. Place the roasting pan with the drippings on the stovetop. don't just take the drippings out - the stuff that's stuck to the bottom of the pan is what makes the gravy taste really yummy. Pour in a little chicken stock (or if there's plenty of drippings in there already, don't worry about adding liquid. Stir it while it's heating and make sure to gently scrape up the bits stuck to the bottom of the pan (be careful when using metal utensils - make sure your roasting pan can handle it.
2. While that's gently heating, in a separate saucepan, melt some butter (a couple of tablespoons - more if you're making a huge turkey or something) and add some flour (2 or 3 tablespoons - it's loose). Mix the flour and butter to get a rue and heat it over medium heat until the butter/flour mixture browns a bit (3 minutes or so) - stirring often to prevent burning. Gradually add the sauce mixture from the roasting pan to the flour mixture, stirring constantly. It should thicken rather quickly. Stir until it thickens to your liking. Season with salt and pepper to taste and VOILA! Gravy.
An alternative to plain chicken stock...I actually boiled the giblets in chicken stock (with onions, celery, salt and pepper) for about an hour (all except the liver), then added the liver and boiled another 20 minutes or so. I then strained that mixture so only the broth was left. That's what I used to heat up and loosen the bits on the bottom of the roasting pan. Yummy - and not a bit ...Giblet-y . It's just a flavoring thing. Makes the broth savory.
One last thing I must mention. If you haven't been already (this is for LA locals only) - you must go to Jon's Market. They have the best prices on produce. It's ridiculous, really. My receipt read like this....Onions, 20 cents - garlic, 10 cents - 2 red bell peppers, $1.00 - celery, 50 cents - cilantro - 50 cents. Persimmons were on sale - 2 pounds for $100. I got a giant bag of persimmons for $1.00. They're like $1.50 per pound at the store (when they're on SALE). I usually stay away from the meat section (the meat's fine, but the other things they sell freak me out - like chicken feet and intestines and stuff) - shudder. This time, however, I ventured over there and found some good looking meat (and chicken), at really excellent prices. And their other products (every day household things, soft drinks, etc) - are not very cheap, so don't bother. Also, their spices are super cheap - great place to go for spices.
One last note for you - I used my new tortilla press to make corn tortillas. I am VERY EXCITED! It makes the whole process super easy and fun. And my tortillas look perfect. Yay for the tortilla press! (and I made some simple chicken enchiladas with the leftover chicken - best EVER!)
Later!
Thursday, October 2, 2008
Cheese Enchiladas (and Sauce)
Ugh - so many recipes...so little time. Sorry it's been a little while since the last post. I'm still continuing on the Mexican theme. I LOVE enchiladas and yes, chicken and beef are fine, but for me, it's all about the cheese. I love me my cheese - I gotta have me some cheese. So, this recipe is for cheese enchiladas. I actually am including a recipe for homemade enchilada sauce, too, but frankly, I didn't like it as much as the stuff from the store. It's good, but different than what I'm used to. I recommend just using store-bought, but I included the recipe in case you want to try it. Here ya go!
Cheese Enchiladas
Ingredients:
1 lb of mild cheddar cheese, grated
corn tortillas
vegetable oil
1/4-1/3 cup finely chopped yellow onion (optional)
Enchilada sauce, heated
black olives (sliced)
sour cream, optional
guacamole, optional
Directions: (all this stuff about dipping the tortillas in oil is something I tried once and found to be kind of useless. Most recipes say to do this, so I'll leave it in here in case you want to do the whole "shebang", but for me, dipping in hot enchilada sauce was enough to soften the tortilla).
Heat the vegetable oil in a frying pan on medium heat. You will need some tongs and a plate or tray to assemble your enchiladas. Using tongs, dip two corn tortillas at a time into the hot oil. When the tortillas start to bubble, lift and dip them into the oil 3 times fairly quickly. The goal here is to make the tortillas soft. If the tortillas are left in the oil too long they will get hard and be difficult to roll. If that happens just toss them out and start over. The other option is to go ahead and keep cooking them in the oil until they become hard. These can be used as tostada shells if you like.
Okay, back to dipping the tortillas 3 quick times in the oil. Once you do this, dip the tortillas into hot enchilada sauce to coat. Now put the tortillas on a plate to cool one minute. Add a handfull of the grated cheese and sprinkle some onion down the center of one tortilla and roll it. (you can also add some sliced olives before you roll it). Do this by grabbing one end of the tortilla and bringing it 3/4 of the way over to the other end. Tuck and roll the tortilla. Pick up the cheese enchilada with your fore fingers on the botton where the seam is. Let your pinky fingers cover the ends of the enchilada to keep the cheese from falling out while you move it to an oven proof dish.
Pour hot enchilada sauce over the top of the cheese enchiladas and let plenty of sauce run down the sides. Remember, the sauce is what makes it!
Sprinkle more cheese and onion on top in the desired amount.
Preheat the oven to 400 degrees and place your enchiladas in the oven. Heat the cheese enchiladas until they look somewhat flat and the sauce is bubbling. This will probably take 15 minutes or more. Remember, you want to make sure the cheese inside the enchilada is melted.
Enchilada Sauce - Red
Ingredient
1 tablespoon olive oil
2 cloves garlic, minced
1 teaspoon minced onion
1/2 teaspoon dried oregano
2 1/2 teaspoons chili powder (I went to a hispanic market and got some really cheap (like 50 cents for a bag) - I just asked someone that worked there WHICH chili powder would be good for enchilada sauce. There are a LOT of choices of chili power, believe it or not).
1/2 teaspoon dried basil
1/8 teaspoon ground black pepper
1/8 teaspoon salt
1/4 teaspoon ground cumin
1 teaspoon dried parsley
1/4 cup salsa
1 (6 ounce) can tomato sauce
1 1/2 cups water
Directions
1. Heat the oil in a large saucepan over medium heat. Add the garlic and sauté for 1 to 2 minutes. Add the onion, oregano, chili powder, basil, ground black pepper, salt, cumin, parsley, salsa and tomato sauce.
2. Mix together and then stir in the water. Bring to a boil, reduce heat to low and simmer for 15 to 20 minutes.
Wednesday, September 17, 2008
Sweet Corn Tomalito - Just like Chevy's - YUMMM!!!
Anyone go to Chevy's? You know, the Mexican Restaurant? They have this corn stuff that comes with most meals - it's called Sweet Corn Tomalito. It's sooo good, but they only give you like a tablespoon of it, if you're lucky. Well, now you can make it yourself...at home....and eat as much as you like! And, like I promised you....I actually took pictures. Here it is...


Sweet Corn Tomalito
Ingredients:
5 Tbsp. butter, softened
1/4 cup masa (corn flour) (Remember, this is the same stuff you used to make flour tortillas. It's NOT cornmeal - it's corn FLOUR - you can get it at many large supermarkets and any ethnic market).
1/3 cup sugar
1/2 cup water
2 cups corn kernels, fresh or frozen, thawed
1/2 cup cornmeal
1 tsp. baking powder
1/2 tsp. salt
2 Tbsp. plus 1 tsp. milk
Directions:
1. In a small mixing bowl, mix the butter, masa, and sugar using an electirc mixer until light and fluffy. About 1 minute.
2. In a blender, blend half of the corn kernels with the water until smooth.
3. Combine this mixture with the butter mixture, stirring well.
4. Add the remaining corn kerrnels, corn meal, baking powder, salt and milk and mix well.
5. Pour the corn mixture into an 8 inch square baking pan. tightly cover with foil. Steam by setting atop a medium sauce pan of water on top of the stove. Bring water to a boil and steam corn mixture for 50 minutes to one hour. Keep an eye on the water, you may need to add more. (There are other methods for cooking. Apparently, the "Chevy's Cookbook" says you can preheat oven 250 degree F. Place covered dish in a larger roasting pan filled with so water is 3/4 of inch up side of baking dish. Bake for 1 1/2 to 2 hours. I'm sure you can use a double boiler. That's basically what I did, but since I didn't have a double boiler, I lined the steamer basket of a pot/basket set - see the pictures.)
6. It is done when a toothpick inserted in the center comes out clean. Tomalito should have a smooth, moist texture.
* Note: the pan must be tightly wrapped at all times.
Friday, September 12, 2008
Flan and Meringues
While we're on the Mexican thing - let's do flan. I actually went out and bought little ramekins (AKA - cute little individual-sized ceramic baking dishes). Granted, I was going to go shopping at the cooking store anyway (birthday money...what else?). So, along with a bunch of other great stuff, I got these little dishes just for this very purpose.
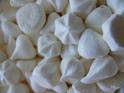 And what's the deal with my title - "Flan and Meringues"? Well, flan uses 10 egg yolks. I HATE wasting food. So, what are you supposed to do with all the egg whites? You could freeze them in a baggie (I do that all the time), or better yet, why not make Meringues? They are sooo yummy and so easy and you get so messy (FUN and delicious messy) while you're making them. AND, if you keep them in an airtight container, they last FOREVER. So, I'll post the recipe below. I used a decorating tip (you can use a cookie press, too) and they came out looking perfect - just like the ones from Trader Joe's. This picture is NOT of my meringues (actually, mine looked even MORE perfect...yes, I'm bragging).
Unfortunately, I didn't take a picture of the flan either, so you'll have to imagine it. Or look it up online - there must be a thousand pictures out there. I promise to be better in the future about taking pictures of my creations.
I had never made custard before, so this was definitely a new adventure for me. All in all, it turned out well. I don't really get the part where you turn the custard out onto a dish and a bunch of VERY hard, carmelized sugar remains in the baking dish. I mean, a nice amount comes out and drips down the sides of the custard, but still.... a lot of it just stays in the dish. In fact, I had a heck of a time trying to figure out how to get it out. You can't break it with a knife (it's THAT hard). You can't really hit it with a hammer (it's in a ceramic dish, mind you). But what did end up working like a charm for this clean-up job was very hot water. My tap, fortunately, produces REALLY hot, steaming water. I just ran that in the dish for a minute or so and it re-melted and washed away all that sticky caramel. If you don't have really hot tap water, I'm not sure what to tell you. Letting boiled water sit in the dish might work, but it has to be repeated several times (boil, soak, rinse, etc). Not sure why that is. But the running hot water definitely worked like a charm.
WHY am I even talking this much about cleanup when you haven't even had a chance to enjoy the product. I gave some to my neighbors (one of whom is hispanic) and they said it was the best flan they had ever had - ANYWHERE! By far. I'm not bragging (I didn't invent it, after all). But I'm just saying - this is really, really good and your PEOPLE (friends, family, neighbors) will love it. Next time, maybe the enchiladas recipe...how's that sound? But for now...here's the flan -
Flan
INGREDIENTS:
10 egg yolks
1 (14 ounce) can sweetened condensed milk
1 (12 ounce) can evaporated milk
1 to 1/2 cups sugar
(maybe 1 tsp vanilla if you want) (I did add vanilla and it was great)
DIRECTIONS:
1. Preheat oven to 325 degrees. You will need 6 ramekins or other specialty flan cook ware and a large baking pan to put them in.
2. Pour sugar in warm pan over medium heat. (Be REALLY careful with the heat here. It's a fine line between carmelized sugar and burnt sugar. In fact, mine was a tiny bit bitter, which means it was a bit burnt. It still tasted great, but it could easily have been ruined. Keep the heat fairly low - better safe than sorry). Don’t stir sugar, but swirl sugar around until it browns and becomes caramel. (The point of not stirring the sugar has to do with the fact that you don't want to stir the non-melted sugar (like some that may be stuck on the side of the pan) into the melted sugar. I guess it throws off the whole process. Let it melt together as it naturally wants to - don't force it. Frankly, I think I stirred it a bit toward the end, and it was fine - just be aware). Quickly pour approximately 2-3 tablespoons of caramel in each ramekin, tilting it to swirl the caramel around the sides. Reheat caramel if it starts to harden (other recipes say to let the caramel harden in the bottom of the ramekins before pouring the custard in. I say it doesn't matter. It will melt when it's cooking anyway).
3. Whisk together the yolks, condensed milk, and evaporated milk (and vanilla if you want); set aside.
4. Pour custard into caramel lined ramekins. Place ramekins in a large glass or ceramic baking dish and fill with about 1-2 inches of hot water. Bake for 45 minutes in the water bath and check with a knife just to the side of the center. If knife comes out clean, it's ready.
5. Remove and let cool. Let each ramekin cool in refrigerator for 1 hour (this is a little tricky. You HAVE to wait for the custard to harden. But don't wait forever, because the caramel sauce has to still be a liquid. Some of mine took longer than an hour. Like I said, the custard HAS to be set (that's not optional), so that should be your guide as to when to turn the custard out on to a plate. Also, I found that it helps to run a sharp knife around the outside edge of the custard before you turn it over - it comes out smoothly). Invert each ramekin onto a small plate, the caramel sauce will flow over the custard.
Authentic French Meringues
(I did this recipe times 2 1/2, so I could use up my 10 egg whites. You will need at least 2 LARGE baking sheets to fit all the meringues this makes)
INGREDIENTS:
4 egg whites
2 1/4 cups confectioners' sugar
DIRECTIONS: (Please read all the tips at the bottom first - they really help).
Preheat the oven to 200 degrees F (95 degrees C). Butter and flour a baking sheet (for this particular recipe, I really did butter and flour the baking sheets, as opposed to using PAM. I figured that since egg whites are so delicate and have little flavor of their own, they would probably pick up the flavor of the PAM, which I wouldn't want. Now, butter, on the other hand, tastes great, so that was my choice.)
In a glass or metal bowl, whip egg whites until foamy using an electric mixer. Sprinkle in sugar a little at a time, while continuing to whip at medium speed. When the mixture becomes stiff and shiny like satin, stop mixing, and transfer the mixture to a large pastry bag. Pipe the meringue out onto the prepared baking sheet using a large round tip or star tip. (If you don't have a fancy thing to pipe out the meringue, just use a spoon and make a dollop (AKA "a plop") on the baking sheet).
Place the meringues in the oven and place a wooden spoon handle in the door to keep it from closing all the way. Bake for 3 hours, or until the meringues are dry, and can easily be removed from the pan. (it only took me just a little over 2 hours - check once in a while and taste one to see if it's done to your liking - this is pretty loose, since they'll either be dry, or dryer. That's the nature of a meringue. You can't over dry them, I don't think. But I suppose you could burn the bottoms, so that' a good reason to check on them after a couple of hours. If the bottoms are getting brown, they're either done or your oven's too hot). Allow cookies to cool completely before storing in an airtight container at room temperature.
EGG WHITE TIPS:
1. Use a clean, dry bowl. The bowl must be grease-free, because any trace amount of fat will wreck a meringue. Glass, ceramic, stainless steel, and copper bowls are all suitable. Plastic bowls may appear clean, but may still have trace amounts of oil, so do not use them.
2. Cold eggs separate easily, but eggs whip to a higher volume when at room temperature. The solution is to separate the cold eggs, and then set them aside for 10 or 15 minutes.
3. Separate each egg into two small bowls, one for the white and one for the yolk, and then add the white portion to the larger bowl. This allows you to reserve any with broken yolks for another purpose. Even a small amount of yolk can deflate the egg whites, so be careful.
TIPS For A Basic Meringue:
Cream of tartar, white vinegar, or lemon juice can all be used to stabilize a meringue.
1. Add 1/8 teaspoon of cream of tartar per egg white to the unbeaten eggs. (If you're using a copper bowl to make your meringue, don't add any acid: it can react with the copper and discolor the egg foam.) (I used a dash of lemon juice - just a small dash (maybe a Tbsp) - it worked well and I knew that even if a little tiny bit of lemon flavor remained in the finished product, it wouldn't bother me. As it turns out, no lemon flavor remained - it was just pure sugar!)
2. Whip to medium-soft peaks. Beat in 2 tablespoons white sugar per egg white. Continue to beat until egg whites are glossy and hold a firm peak.
3. Adding sugar early in the beating process results in a firmer, finer-textured meringue.
Tuesday, September 9, 2008
Homemade Corn Tortillas
Did you like the flour tortillas? Well, here's the corn version. It's super simple, like the flour ones, but you do have to have a special ingredient - Corn Masa Mix, or Corn Flour. It's not the same as cornmeal, so don't try to substitute. My regular supermarket carries it - the brand name is "Maseca". But if your market doesn't have it, go to any hispanic or ethnic-focused market and they should have it. It's a staple for certain cultures. Alrighty - have fun and enjoy...
DISCLAIMER (yes, I know I like to use disclaimers...) - this recipe is pretty much copied from another website. I'm just sharing it with you here, along with any personal notes I made.
Homemade Corn Tortilla Recipe
Makes 10 to 12 tortillas (6 to 7 inch)
Ingredients:
2 cups Maseca Corn Masa Mix
1 tsp. sea salt (come on - let's get real. I just used regular salt)
1 1/4 cup hot water plus 2 to 3 tablespoons
1 tsp. shortening (who uses shortening? I just used butter -worked great. No wait....maybe I used vegetable oil -...yes, I think I did. Normally you can't substitute oils for shortening (because oil is a liquid at room temperature, while shortening is solid - it's an important distinction). But in this case, it's mostly just for moisture and flavor, so oil worked fine).
Directions:
Mix the masa harina (corn flour, not to be confused with corn meal) and salt in a medium sized bowl. Measure 1 1/4 cups of boiling water and the shortening into a separate pan or bowl. Stir until the shortening is melted.
Pour this mixture into the bowl of corn flour and mix with a fork.
When the mixture is cool enough to touch (a couple of minutes) mix the dough with your hands. The dough will probably be a little dry. Add hot water one teaspoon at a time until the dough stays together and doesn't crumble apart.
Knead the dough for one or two minutes. Play with the consistency by adding more water if needed. What you want is a dough that is moist enough to stay together but not too sticky.
If you have a tortilla press - now's the time to get it out. If not, don't worry. You can do this with a rolling pin and it's a lot easier than the flour tortillas. This dough is more friendly.
Make Golf Balls
Pinch off some dough and roll into smooth round balls (golf ball size) with your hands. I would suggest covering the dough you're not working with, with either plastic saran wrap or damp paper towels to keep the dough from drying out while you are making the dough balls.
Flatten the ball a bit in the palm of your hand. At this point, you should be pre-heating a cast iron or comal pan over medium high to high heat. No oil or PAM or anything is needed in the pan.
Pressing The Dough
(works the same with a press or without -if using a roller, simply roll dough between plastic sheets). If you are using a tortilla press, first get yourself a Ziploc type bag. Sandwich size or gallon size will work. I like to use this type of plastic because it is thicker and easier to work with. Cut it in half so you have two separate pieces. Lay one piece on the press and then place the slightly flattened dough on top, a little bit closer to the hinge of the lid like in the picture.
Cover the dough with the second piece of plastic and close the lid to flatten the tortilla. Carefully peel the top piece of plastic from the tortilla. Lift the tortilla and the bottom piece of plastic from the press and place it in your hand, dough side down. Now carefully peel the bottom piece of plastic from the tortilla.
I did not have any problem with the dough sticking to the plastic. If you do, it probably means your dough is too wet. Try adding a sprinkle of corn flour and kneading the dough a bit more.
Cooking The Tortillas
Place your tortilla in the preheated cast iron pan or comal and cook for 45 seconds to a minute then turn over and cook for another 45 seconds or longer. (the timing totally depends on the heat of your stove and pan - it can vary quite a bit. I cooked mine a bit longer).
Place cooked tortillas in foil and cover with a clean kitchen towel to keep warm. Store tortillas in a Ziploc bag in the refrigerator for several days.
Wednesday, September 3, 2008
Homemade Flour Tortillas
Don't freak out - they're actually really simple to make. I won't say easy because rolling them out took a little doing, and a little patience. But seriously, the dough was soooo easy and the tortillas are sooo worth it. Yummmm....
So, today, it's flour tortillas. Next time, I'll share the corn tortilla recipe and after that... (drum roll please)... sweet corn tomalito. It's just like the one at Chevy's - maybe even better. So stay tuned. And now, flour tortillas:
Homemade Flour Tortillas
2 cups all-purpose flour
1-1/2 teaspoons baking powder
1 teaspoon salt
2 teaspoons vegetable oil or non-hydrogenated lard
3/4 cup lukewarm milk
In a bowl, stir together the flour, baking powder, and salt. Add vegetable oil to the lukewarm milk and whisk briefly to incorporate. Gradually add the milk to the flour mixture, and using clean hands, work into a sticky dough.
Turn dough out onto a surface dusted with flour and knead vigorously for about 2 minutes or until the dough is no longer sticky.
Return dough to bowl, cover with a damp cloth and allow to rest for 10 -20 minutes so that it will be easier to roll out.
Divide dough into 8 balls of equal size, cover them, and let them rest again for about 20 minutes. Avoid letting them touch, if you don't want them to stick together.
Dust a clean pastry board or working surface with flour.
NOTE: I found a great tip online to help make the next step a lot easier. A small disclaimer here - this worked really well with corn tortillas. I'm assuming it'll work with flour tortillas, but you'll have to be the guinea pig on this one! You can take a large freezer bag (gallon size) and cut it in half. The thick plastic works better than saran wrap. Place the dough in between the two halves and roll it out that way (in between two sheets of plastic). Then, to remove the tortilla from the plastic, peel the top layer off. Pick it up and flip it over, so the tortilla dough is against your hand. Peel the 2nd sheet of plastic off with your other hand. Plop it right from your hand into the hot pan.
One at a time, remove each piece of dough. Press it out into a 5-inch circle. Using a flour dusted rolling pin, roll out the tortilla from the center out until the tortilla measures a little less than 1/4 inch thick and is a 7 or 8 inch circle (the challenge is that this dough wants to bounce back. It's takes some patience to keep rolling it, letting it bounce back, then rolling it again. Eventually, it does get bigger. If you plan on making this more often (and I'm considering it), then you might consider getting a tortilla press. They're not very expensive (maybe $20 or so online), and they make the process a lot easier. Even without the press, though, this really was one of the easiest recipes I've ever made.)
Transfer the tortilla to a dry preheated skillet or griddle. when the tortilla begins to blister, allow it to cook for 30 seconds, flip it, and cook the other side the same way. (I cooked them longer - about a minute on each side).
Remove tortilla, place it in on a clean paper towel and cover loosely with foil. Repeat for remaining tortillas.
Tortillas freeze well. Wrap tightly in plastic, removing any air pockets. Keeps frozen for several weeks.
To serve tortillas which have been frozen, thaw at room temperature, wrap in foil and heat in a warm oven.
Saturday, August 30, 2008
Classic Peanut Butter Cookies
Mmmmm.....cookies. Speaking of mmmmm, I saw a baby "onesie" today that read, "mmmmm....boobies". Very funny, I think!
Anyhow, we will not be talking about that here. I'm talkin' cookies - peanut butter cookies. To be honest, I'm not a huge fan of peanut butter cookies in general. I made these because my husband, Jay, loves them. And, he did love these. The recipe I got online said to only bake them for about 10 minutes (some suggested even less), so that they're soft. They say that they are soft when they come out of the oven, and then the outside firms up, while the inside stays soft. My experience was that they were soft and stayed soft. My hubby still loves them, but they're not the firmness that I would choose. That's why I recommend baking them 10 to 15 minutes (or even more, so long as you keep an eye on them and don't let them burn). But, of course, if you like soft peanut butter cookies (and a lot of people do), then bake them for 10 minutes or slightly less.
Here's the recipe:
CLASSIC PEANUT BUTTER COOKIES
INGREDIENTS
1 cup unsalted butter
1 ½ cups crunchy peanut butter
1 cup white sugar
1 cup packed brown sugar
1 tsp vanilla
2 eggs
2 3/4 cups all-purpose flour
1 teaspoon baking powder
1/2 teaspoon salt
1 1/2 teaspoons baking soda
DIRECTIONS
Cream together butter, peanut butter and sugars. Beat in eggs and vanilla.
In a separate bowl, sift together flour, baking powder, baking soda, and salt. Stir into batter. Put batter in refrigerator for 1 hour.
Roll into 1 inch balls and dip each ball in granulated sugar. With sugared side up, put on baking sheets. Flatten each ball with a fork, making a criss-cross pattern. Bake in a preheated 350 or 375 degrees F oven for about 10 to 15 minutes or until cookies begin to brown.
Wednesday, August 27, 2008
Ham and Basil Pasta with Cream Sauce
Hey, y'all! Sorry I haven't written in a little while. I've actually been cooking up a storm. I have lots of recipes to share with you. Let's do them one at a time, though, shall we?
So, I had the girls over the other night for our book group. We do talk about "the book", but it's mostly an excuse to get together and eat and talk. That's what girls do best!
Now, here's the story of this pasta..."Here's the story....of a lovely pasta..." (cue music) - JUST KIDDING. But seriously, I was at Panera Bread when I smelled this smell that was not only delicious, but it totally reminded me of a recipe I used to make like 20 years ago. I learned it in high school. For the life of me, I could not remember what it was. It came a piece at a time. First, I realized it was pasta. Then, the ham and basil. Then parmesan. Then mushrooms, and on and on like that. It took me about a day of mind probing to even begin to recall the recipe, but it did finally come together. I think this version is a bastardized version of what I once knew, but it turned out pretty good, so ... whatever. I warn you - it's a bit complicated - not HARD, just complicated and it takes a bit of time. AND, the recipe easily feeds 10, so feel free to cut it down to size.
Ham and Basil Pasta with Cream Sauce
(makes 10 servings)
Ingredients:
2 Tbsp olive oil (or any oil you like the flavor of)
4 cloves garlic, minced
4 cloves shallot, minced
8 Tbsp Butter (separated out into 6 Tbsp and 2 Tbsp)
1 Tbsp Flour
1 cup dry white wine or chicken stock (depends on your taste – I completely left this out and it still turned out great)
2 cups heavy cream (Don't substitute a lighter milk product here unless you REALLY know your way around creams and sauces. Only heavy cream thickens when simmered. Other milk products will separate or react in other undesirable ways, so you'd have to be very confident about your alternative method of thickening the sauce).
2 packages sliced mushrooms (20 oz)
1 ½ cup peas (cooked, but not overcooked or mushy)
25-30 leaves fresh basil, chopped (you can’t have too much)
8 to 12 oz cooked ham, chopped into small squares or cubes
2 – 12 oz. packages of farfalle (or your favorite pasta)
2 cups fresh grated parmesan (you can substitute some (preferably not all) of the processed stuff in the green can, too. It’s actually not bad in this)
Salt and pepper to taste
Directions:
NOTE: It’s probably a good idea to prepare everything ahead of time (chop garlic and shallots, chop ham, grate cheese, chop basil, etc.)
1. Heat water for pasta and cook the pasta according to the package directions while you do the rest of the stuff in the recipe.
2. Cook peas according to directions (don’t overcook. You don’t want them to be mushy). Set aside.
3. Heat 2 Tbsp. olive oil in a pan. Add ham. Sautee on high heat until slightly browned (stirring often). Set aside.
4. Heat cream in heavy bottom large saucepan or pot, over very low heat. Let it simmer for about 20 minutes or until slightly thickened, stirring occasionally. (DO NOT LET IT BOIL – JUST A VERY GENTLY SIMMER. Boiling will cause it to separate).
5. While heating cream in a separate pan, place garlic, shallots, and 6 Tbsp butter in another pan and cook over low/medium heat for about 2 to 3 minutes, stirring often. Remember, garlic burns really easily! Add 1 tbsp flour and stir. Cook for 2 minutes, stirring often. This will cook the flour taste out of the mixture. Add chicken stock or wine to the garlic butter mixture and let it reduce over low heat for about 15 to 20 minutes. – I completely forgot to add the chicken stock or wine and it turned out fine anyway. I think it just gives it more flavor, which I made up for later by adding extra salt.
6. Add chicken stock mixture to cream. Stir. Cook over very low heat for about 2 minutes or until thickened (stirring often)
7. If you have another (very large) pan for sautéing, then get that out now. Otherwise, if you’re like me and have only one large fantastic pan (we’ll call that “pan A”), then move the cream sauce mixture to another pan (we’ll call that…you guessed it, “pan B”) and wipe the cream out of pan A. We will use that large and fabulous pan A to sauté the mushrooms. Place 2 Tbsp butter and all of the mushrooms in the large pan and sauté until cooked, stirring occasionally (about 3 to 5 minutes). The length of time really depends on how you like your mushrooms. Add salt and pepper to taste while cooking (black pepper goes great with mushrooms).
8. In whichever pot is biggest, combine cooked pasta, cream sauce mixture, ham, peas, basil, mushrooms (including their sauce in the pan), and parmesan. Stir it all together and add salt and pepper to taste.
INCIDENTALLY – processed parmesan cheese is actually great in this recipe, if you use it to supplement the fresh stuff. I wouldn’t go all processed, although it would taste fine. Fresh stuff really adds a lot. You can sprinkle the processed stuff on top, or add some in to the pasta mixture to taste.
Tuesday, August 12, 2008
Linzer Cookies - They May Just Be Worth The Effort


I got a craving for these cookies the other day. My Dad has a Hungarian restaurant and they used to make them all the time - Linzer Cookies. If you're not familiar with them, they're basically a buttery, nutty cookie sandwich, with rasberry jam in the middle, topped with powdered sugar. They're very European. You can get some at the store - I'm pretty sure Pepperidge Farm makes them - but they're not the same as the real thing. After I first made these, I thought "this is definitely not worth the effort". Sometimes, it's fun just to make something and say that you made it, all the while knowing that you probably won't do it again because it's not worth all the work. But after eating these for a couple of days, I have to say I've changed my mind. They are totally worth it! Give it a try if you have a little time. I made the dough and let it sit in the refridgerator overnight. That makes it seem like less work because you're not doing it all at once. Here it is - enjoy!
Linzer Cookies
1 cup (110 grams) blanched or sliced almonds, toasted and ground (hazelnuts, or pecans can also be used)
2 cups (280 grams) all purpose flour
1/2 teaspoon cinnamon
1/4 teaspoon salt
1 cup (227 grams) (2 sticks) unsalted butter, room temperature
2/3 cup (135 grams) granulated white sugar, divided
1 teaspoon pure vanilla extract
2 large egg yolks
Zest of 1 lemon (Note: Lemon Zest is the yellow outer rind of the lemon that contains the fruit's flavor and perfume. Can be removed with a citrus zester or grater. When removing the outer rind (zest) do not remove the white pith, which is very bitter and inedible.)
Confectioners' (Icing or Powdered) Sugar for dusting
1/2 cup seedless Raspberry or Black Currant Preserves or Jam (can use other flavored preserves or jam)
Preheat the oven to 350 degrees F (177 degrees C) and place rack in the center of the oven. Toast the almonds (or pecans) on a baking sheet for about 8-10 minutes (or until lightly browned and fragrant). If using hazelnuts, toast them for 15 minutes or until fragrant and the skins begin to flake. (This next step is for hazelnuts or WHOLE almonds only...) Remove from oven and place the hot nuts in a dish towel. Roll up the towel and let the nuts sit (steam) for five minutes then rub the nuts in the towel briskly to remove the skins.
Once the nuts have cooled, place in a food processor and process with 1/4 cup (50 grams) of the sugar from the recipe until finely ground. (the sugar is important here because it soaks up the moisture from the nuts and keeps your mixture from turning into paste). Set aside.
In a separate bowl, whisk or sift together the flour, cinnamon, and salt. Set aside.
In the bowl of your electric mixer (or with a hand mixer), cream the butter and remaining sugar until light and fluffy (approximately 3 minutes). Beat in the vanilla extract, egg yolks, and lemon zest. Beat in the ground nuts. Add the flour mixture beating just until incorporated.
Divide the dough in half and shape into two rectangles. Roll out a long sheet of plastic wrap and place one of the dough rectangles on it. Roll out another sheet of plastic wrap about the same size and place on top. The original recipe said to roll out (with your hands or a roller) each half of the dough into a 1/2 inch thick rectangle, stick it in the fridge and let it firm up, then roll it thinner, into a 1/4 thick rectangle. I found that a firm dough is impossible to work with. It just cracked and broke when I tried to roll it thinner. I basically had to warm it up again to be able to roll it out. THEREFORE, I recommend just rolling the dough out (on a lightly floured surface, of course) into the 1/4 thickness that you want (it's pretty thick), and put it into the fridge at that thickness. Then, when you're ready to cut it, it will be firm and ready for cutting, but won't need to be rolled out anymore. Incidentally, you can leave this dough in the fridge for several days if you want to, before you cut it.
Preheat oven to 350 degrees F (177 degrees C) and place rack in center of oven. Line two baking sheets with parchment paper and set aside.
Using a 2 to 3 inch (5 to 7.5 cm) cookie cutter (round, square, heart, etc.) cut out the dough. Place the cookies about 1 inch (2.54 cm) apart on the prepared baking sheet. Use a smaller cookie cutter (3/4 - 1 inch (2.54 cm)) to cut out the centers of half of the cookies on the baking sheet. (You will be sandwiching two cookies together and there will be a small 'window or cut out' in the top cookie so you can see the jam underneath.) (FYI - I used a scalloped edge biscuit cutter for the main cookie cutter and an apple corer for the center hole. It was the perfect size and shape).
Reroll any scraps and cut out the cookies. Remove the other half of the dough from the refrigerator and roll and cut out the rest of the cookies. Bake the cookies for 12-14 minutes or until they are very lightly browned. Remove from oven and place on a wire rack to cool. (as usual, it took me a little longer in the oven).
While the cookies are cooling place the raspberry jam in a small saucepan and heat gently until it has thickened slightly. Strain if there are any lumps in the jam. Let cool. (I've got to be honest with you - I have no idea what the purpose of this is. I used "jam" (as opposed to preserves or jelly), and when it cooled, it was exactly the same consistency as it had been when I took it out of the refrigerator. It seems like a needless step and in fact, I ran out of "cooked" jelly and used some straight out of the jar for the rest and I couldn't tell the difference.)
To Assemble Cookies: Place the cookies with the cut-outs on a wire rack and lightly dust the tops with the confectioners' (powdered or icing) sugar.
On the bottom surface of the full cookie (top of cookie will face out) spread with about a 1/4 - 1/2 teaspoon of jam. Place the cut-out cookie on top and gently sandwich them together, making sure not to smug the confectioners' sugar. Using a small spoon, fill the cut-out with a little more jam.
Note: You can store the unassembled cookies in the refrigerator for several days in an airtight container. It is best, though, to assemble the cookies the same day as serving in order to keep the cookies crisp..
Makes about 20 - 2 inch (5 cm) sandwiched cookies.
SOOOO YUMMMY!!!!!
Friday, August 8, 2008
Mushroom White Wine Cream Sauce
So what do I do with my leftover heavy cream? Remember - I used a bunch to make that creamy tomato bisque? Well, I figured that some sort of cream sauce would be just the thing. I did a Google search (SORRY, Julie!) on "heavy cream sauce" or something like that. I took a recipe I found and made it my own because, of course, if I'm going to make some sort of delicious sauce, it's got to have mushrooms in it. Incidentally, this was sooo rich and I ate it all (which was too much for one person). As a result, I actually felt kind of nauseous. I guess that's not a great thing to say when describing a recipe - "it made me sick", but seriously...all I'm saying is that this is extremely rich and while very delicious, it should be eaten in moderation. Easier said than done because it's really, really yummy. Here it is - enjoy!
White Wine Mushroom Cream Sauce
Ingredients:
1 clove garlic, minced
1 clove shallot, minced
2 Tbsp Butter
1 package sliced mushrooms
¼ to ½ cup dry white wine
½ cup heavy cream
Salt and pepper to taste
Finely chopped fresh parsley (optional, but it does add a nice fresh taste and it looks so pretty)
Directions:
Saute minced garlic and/or shallot in butter over low/medium heat for 2 minutes. Add sliced mushrooms (whatever amount you like – I used one package from Trader Joe’s). Sautee over medium heat, stirring occasionally, for about 5 minutes or until mushrooms change color. You can’t really overcook them – it just depends on how you like your mushrooms. Remember to keep the heat low enough not to burn the garlic and shallot.
Add ¼ cup to ½ cup white wine (I didn’t measure it). Let it reduce for 5 to 10 minutes, or until there’s just a few tablespoons of liquid left in the pan. Turn off heat. Stir in ½ cup heavy cream, salt and pepper to taste. Stir in chopped fresh parsley and serve over noodles.
Incidentally, I a friend just told me about a "grilled peach" recipe that I will have to try and share with you... I will - stay tuned...
Tuesday, August 5, 2008
Vons Tomato Bisque...mmmmm
We have a grocery store chain out here on the west coast called Von's (some of their stores are called Pavilions - it's the same store). Anyhow, they make this tomato bisque soup that is to die for. I think it's called Tuscan tomato basil or something like that. I decided I had to have the recipe, so I used the magic of the Internet. it's amazing how you can just go to Google (or Yahoo search...that was for you, Julie)....and find anything you want. I just typed in something like "Von's tomato bisque" and came up with a few different versions. I picked one that had lots of good reviews and, as always, I took some of the suggestions from the other folks who had made the recipe, and incorporated those suggestions into "my" version. I served this with some super easy homemade parmesan croutons. Here it is!
Creamy Tomato Basil Soup (aka Von's Tuscan Tomato Bisque), with Parmesan Croutons
INGREDIENTS:
For the soup:
4 tomatoes - peeled, seeded and diced (canned is ok – crushed or diced, but I don’t really know how much – maybe an 8 or 16 oz can? I used sweet cherry tomatoes and didn't seed or peel them - didn't make a bit of difference.)
4 cups tomato juice
14 leaves fresh basil
1 cup heavy whipping cream
1/2 cup butter
salt and pepper to taste
sautéed chopped garlic (1 large clove) and/or shallot/onion (optional)
2 Tbsp olive oil
For the parmesan croutons:
4 large slices of bread
1/4 cup grated parmesan cheese
olive oil to coat
garlic salt (or plain salt is ok, too)
DIRECTIONS:
Preheat oven to 300 degrees.
Sautee one clove garlic and one clove shallot in 2 tablespoons of olive oil in a stock pot over low/medium heat for 2 minutes. Add tomatoes and juice to the stock pot over medium heat. Simmer, covered for 30 minutes.
While that's simmering, brush bread on one side with olive oil. Cut into cubes and spread out on an ungreased baking sheet, oiled side UP. Sprinkle lightly with garlic salt. Sprinkle with parmesan cheese. Bake in 300 degree oven for 20-30 minutes (it's a slow, low heat thing - that's what dries out the bread and makes it crispy - like a crouton. In fact, you can even do it at 275, depending on your oven.)
After the mixture has simmered for about 30 minutes, puree the tomato mixture along with the basil leaves (in a blender), and return the puree to the stock pot. (you don’t have to puree all of the mixture, if you want a little bit of texture left in the soup). Remember, when you puree hot liquids in a blender, only fill the blender 1/3 full (you will have to do it in 2 or 3 batches). Also, you may want to remove the center knob on the lid (to allow steam to escape). Just cover it with a small plate while your actually doing the pureeing.
Place the pot over medium heat, and stir in the heavy cream and butter. Season with salt and pepper. Heat, stirring just until the butter is melted. Remove from heat. Do not boil.
Pour soup into bowls and drop a bunch of croutons in. Yummm!!!
NOTE: This is really fattening. I make no guarantees whatsoever that this will not go straight to your thighs. And, unfortunately, substitutions will NOT produce the same result. Fortunately, this freezes really well, so you can eat some and freeze some for later.
Thursday, July 31, 2008
Spaghetti and Meatballs
Okay, so ... do you know anyone who doesn't like spaghetti and sauce? Thought not. It's like being a kid again. It's ... fun food. The "meatballs" part is just an added fun thing that meat-lovers will appreciate. I'm actually not a huge meat-lover myself, but it's fun once in a while. And guys tend to really be into having the meat in their meals.
So, I'm going to share this spaghetti and meatballs recipe with you. Well, mostly meatballs. I mean, I'll tell you how I do the spaghetti and sauce part, but mostly, the cool part of this recipe is the meatballs themselves. I took the meatball recipe straight out of the Betty Crocker Cookbook. The thing is, I used ground turkey instead of ground beef. I guess it's supposed to be a little bit better for you than beef (not that I care all THAT much, but it's not important, because these taste every bit as good as beef meatballs). The sauce part is just my own creation (mostly prepackaged, so don't be too impressed). Okay, so...here it is:
Spaghetti and Meatballs
Ingredients:
For the Meatballs:
1 pound ground beef or turkey (the store I go to tends to sell ground turkey in 1 1/4 pound packages. I don't know why, but that's what I had to work with, so I changed all the other amounts accordingly. I'll do the math for you here. To be honest, you can be a bit loose with this recipe and it still comes out good. DON'T WORRY!)
1/2 cup dry bread crumbs (add another 1/8 cup or so to go with the extra turkey)
1/4 cup milk (I could do the math here, but the extra amount is so ridiculously small. Basically, add another 1/4 of 1/4 cup)
3/4 teaspoon salt (again, just a tiny bit more to even out the extra turkey)
1/2 teaspoon Worchestershire sauce (and add a tiny bit extra if you've got the extra turkey - it's totally loose)
1 small onion chopped (about 1/4 cup) (I mixed white onion with a little shallot - it's just a matter of taste...plus, I had some shallot I wanted to use up. And, of course, you can add a little more if you've got the extra turkey)
1 egg (I did not add any extra egg to make up for the extra meat and it was still fine. The egg is just there to hold the mixture together and that 1 egg seemed to do the trick).
For the pasta and sauce:
1 jar of "Vodka" spaghetti sauce (or any sauce that's more orange than red - maybe a super cheesy sauce would be a good substitute)
1 jar of spaghetti sauce (any kind that's more red - as opposed to more orange, like the vodka sauce)
A bunch of your favorite pasta (I used spaghetti because it's thick and just seems to go well with this recipe. Also, you may want to consider how much of this you're going to eat at one time. If you want to, you can just make enough pasta to go with your first meal and then, anytime you want to eat more of the sauce and meatballs, just whip up some more pasta to go with it).
A ton of mushrooms (optional) (if you like mushrooms, that is. Otherwise, skip it. I used 2 bags of fresh sliced mushrooms from Trader Joe's. I suppose a bag is about the equivalent of a container of mushrooms from the store. I like the ones from Trader Joe's because they're sliced thick).
2 Tbsp butter (or olive oil) (Just use whichever one you enjoy the flavor of. I happen to think butter goes really, really well with mushrooms).
A dash of salt and pepper
Grated parmesan (optional - for serving on top of the finished product)
Directions:
Mix all the meatball ingredients; shape into twenty 1 1/2 inch meatballs (I actually got more than that out of it...maybe mine were smaller. I used a mellon baller to get them nice and round). Place on an ungreased cookie sheet or rectangular pan. Bake uncovered in 400 degree oven until done and light brown, ABOUT 20 to 25 minutes.
Heat enough water to cook the amount of pasta you've decided make. Remember to add a pretty good sized dash of salt to the water. It does actually flavor the pasta while it's cooking. When the water boils, add a big drizzle of olive oil to the pot, and throw in your pasta. It's usually a good idea to stir the pasta often during the first minute or two to prevent it from sticking together. Cook until the pasta is done (of course, the time depends on what kind of pasta you're making - check the package for suggested times and of course, give it a taste when you think it's ready). I don't recommend the old "throw the pasta at the ceiling and if it sticks, it's done" test. Too messy for me. I just taste it (trying not to burn my mouth in the process) and see if it's the consistency I want.
Saute the mushrooms, butter, salt and pepper in a non-stick pan over high heat until the mushrooms change color and soften (about 4 or 5 minutes). Stir occasionally. (It's not really all that important how long you cook them because they'll cook a bit in the sauce anyway).
If you used a VERY LARGE saute pan that's big enough to hold all the spaghetti sauce and meatballs, then go ahead and just add both jars of sauce to that saucepan with the mushrooms in it. Otherwise, put the mushrooms and both jars of sauce into a large pot or saucepan. Add the meatballs, too. heat the whole mixture over medium-low heat until it's warmed through.
Serve the sauce and meatballs over the pasta and sprinkle with grated parmesan if you want to. YUMMM!!!
NOTE: This makes a pretty good amount of food. You can, of course, freeze some of it for later use. I don't recommend freezing the pasta itself, but you can put the sauce and meatballs into freezer bags in smaller portions (one or two servings). When you want to eat them, just throw the frozen mass into microwave in a loosely covered container (you don't want sauce all over the inside of your microwave and it has to be LOOSELY covered because otherwise, pressure will build up and cause a food explosion inside the microwave. Again - a huge mess!).
Monday, July 28, 2008
Sesame Chicken, etc...
Sesame Chicken - sounds Asian, but actually, it didn't have anything else around it to make it Asian cuisine, so it really wasn't. BUT, it totally could be if you wanted it to be (put it in a stirfry, or on a salad with asian dressing and mandarin oranges). Anyhow, it was good. I saw "The Take Home Chef" do it once and although it's not on his website, I did find some people talking about it on another site and they seemed to have gotten ahold of the recipe. I put this chicken on a salad and it was totally yummy. Here's the recipe...
Sesame Encrusted Chicken
4 tablespoons extra virgin olive oil (actually ALL of these amounts are totally irrelevant. Basically, just have some olive oil for the "drizzling", season as many chicken tenders as you feel like making, and have enough sesame seeds to "encrust" the chicken.)
Salt and freshly ground black pepper
12 chicken tenders (or however many you want to make)
1 tablespoon sesame seeds (I saw this recipe being made on TV, so I know how the chicken was supposed to look. It's really a solid single layer of sesame seeds covering the entire chicken tender, and I can tell you that 1 tablespoon is WAY not enough. I used 3 or 4 tablespoons for just 3 chicken tenders).
Season the chicken tenders with salt and pepper and coat evenly with the sesame seeds (no need to shake off excess, like a lot of recipes tell you to do when you're breading something. Whatever sticks on there is fine). Drizzle with 2 tablespoons of olive oil. Place a non-stick pan over medium to high heat and place chicken tenders into the pan. Cook for 2-3 min on each side. (I made 3 tenders over high heat and it took about double that time on each side. You can let the seeds get nice and golden brown. I was using a very NON-stick pan, so I'm not sure what will happen if you're using a ... NON non-stick pan).
EXCITING NOTE ABOUT THE SESAME SEEDS...I bought some really small jars at IKEA (they're 4 for $2.99) and they're the perfect size to store seeds. And, they have screw tops, so they're really airtight, which is good to keep them fresh.
Incidentally, I made turkey meatballs the other day...YUMMM. More on that next time.
Thursday, July 24, 2008
Zucchini Parmesan Crisps...Eh. Not so great
So, I tried this recipe that I saw on the Food Network (it was that lady who cooks healthy stuff, so I should've known it wouldn't be very good). Dont' get me wrong - I like healthy food, but not when I'm purposely trying to make it that way. I like food that's naturally healthy, like salad and fruit and nuts and seeds. I don't like "low fat, sugarfree" stuff. Anyhow, this recipe was not very good at all. It was too salty, for one (but I put a big dash of salt in it, rather than the prescribed amount, so that's my fault). It wasn't bad. It was just...boring. And frankly, I prefer steamed zucchini with some fresh parmesan on it.
Also, I grated up too much parmesan, so I added extra bread crumbs to even it out. Actually, it was about double what the recipe called for...which makes no difference whatsoever because all it's for is to dip stuff in. So in the end, I had a bunch more bread crumb mixture left over. Just for "shits and giggles", I mixed the rest of the crumb mixture with one whole egg and dumped that on the baking sheet as well. It came out ok. Kind of like ... I don't know. It's not really like anything else. It's not fluffly, but not too dense either. It's a salty dough-cake. Not very exciting, to tell you the truth, but I felt like it couldn't hurt to try. I hated to see all that breadcrumb/parmesan mixture go to waste.
The truth is that this whole recipe was a disappointment because I was imagining the taste and texture of deep fried, breaded zuccini. Now that's yummy! Stupid health food. Next time, I'm going to go straight for the real dough and fry it up in a pan. I'll let you know how it goes.
Anyhow, here's the recipe for those who are willing to sacrifice taste for the sake of eating healthy. Enjoy...
Cooking spray
2 medium zucchini (about 1 pound total)
1 tablespoon olive oil
1/4 cup freshly grated Parmesan (3/4-ounce)
1/4 cup plain dry bread crumbs
1/8 teaspoon salt Freshly ground black pepper
Preheat the oven to 450 degrees F. Coat a baking sheet with cooking spray. Slice the zucchini into 1/4-inch thick rounds. In a medium bowl, toss the zucchini with the oil. In a small bowl, combine the Parmesan, bread crumbs, salt, and a few turns of pepper. Dip each round into the Parmesan mixture, coating it evenly on both sides, pressing the coating on to stick, and place in a single layer on the prepared baking sheet.
Bake the zucchini rounds until browned and crisp, 25 to 30 minutes. Remove with spatula. Serve immediately.
Per Serving:
(serving size, 1/2 cup) Calories 105; Total Fat 6g (Sat Fat 2g, Mono Fat 2g, Poly Fat 0g); Protein 5g; Carb 8.5g; Fiber 1.5g; Cholesterol 1mg; Sodium 222mg Excellent Source of: Molybdenum, Vitamin C Good Source of: Calcium, Manganese, Vitamin B6, Protein
Tuesday, July 22, 2008
A Fish Tale
For some reason, I managed to make some really great fish tonight. I'm usually not very good with fish - it's kind of hit or miss for me. I tend to undercook or overcook it and I really have no idea what kind to buy.
So, I'm not sure what made it great tonight, but I can tell you what I did and maybe it'll all make sense. What I bought was Trader Joe's frozen, wild caught salmon. I defrosted it in the fridge all day and then cooked it on a preheated cast iron griddle (you know, the kind that fits over two burners). Incidentally, I used the grill side (with the lines on it).
The last time I tried fish on that griddle, it stuck pretty badly. It (the griddle) was brand new at the time, and even though it was supposed to be pre-seasoned, I thought maybe it wasn't seasoned well enough. And, I read that the first few times you use cast iron, you should cook foods high in fat, to avoid sticking. Of course, I didn't know that until it was too late..oh well. So, I decided to season it myself.
For those who care, here's where I read up on how to season cast iron (I followed the directions for "new pans", even though mine was supposed to be pre-seasoned. It worked pretty well, I think, because the fish didn't stick too badly this time (I used a short burst of cooking spray as well). There are a lot of bits left on the grill, but the fish came off without too much fuss. I cooked each side for about 3 or 4 minutes over high heat (they were pretty thin fillets. thicker ones may take a minute more). I also threw a little salt, pepper, and lemon juice on there while the first side was cooking.
On a very exciting note...I added a tiny bit of fresh cilantro and parsley (from my newly planted window herb garden), and it made an incredible impresssion. Just a little bit added SO much life to the fish. Very exciting for me, since I just started my little herb garden a couple of days ago.
It's also really easy to make a little sauce to go with the fish. What I make is very much like tartar sauce. It's basically mayonnaise, a little lemon juice, a lot of dill, and some salt. It's just all "to taste" - I don't really measure because you can hardly mess it up. Of course, this sauce is really fattening and high in calories (as far as sauce goes). But then again, unless you eat a ton of it, it's not really going to offset how "good for you" the fish is.
So, there you have it - my fish tale. Tomorrow, I may try Parmesan Zucchini Crisps. Stay tuned...
Monday, July 21, 2008
Bran Muffins
Alright. So, that's a boring way to start a food blog. Sorry, but that's what I made today. They were actually quite tasty and moist. The great thing about this recipe is that you can change it in a million ways. Add different fruit (other than raisins), or add nuts. I'm going to try some sweetened nectarines next time ('cause they're in season and cheap right now). Also, I've heard that zuchini works great, too - or carrots.
I substituted 1/3 cup applesauce for the oil and it came out fantastic. I don't think you can tell the difference, so why add all that fat? Don't get me wrong. I am NOT a fat-conscious cook AT ALL. I normally don't hesitate to throw a stick or two of butter into a recipe. In fact, my motto is "butter, sugar and salt are what make everything taste good." BUT, why do that if you can have something just as good with less calories and fat? I'm not overweight, but I don't feel the need to eat 3 pieces of cheesecake and a bucket of lard every day. Ya know? In fact, you'll find that I really LOVE vegetables. Not because I'm supposed to, but because they can be so delicious if they're prepared well and it DOES make me feel good to eat food that's full of color and life (alongside my pizza, of course).
Oh, and the best part of this recipe? No mixer involved. Just mix everything with a fork. Super easy and quick, with very little cleanup.
Anyhow, here's the recipe and if you want to read other people's reviews and comments, you can click on this link, which is the original place I found the recipe.
As always, my comments are in BLUE.
BRAN MUFFINS
INGREDIENTS
1 1/2 cups wheat bran (This can be a little hard to find. I recommend a health food store. Whole Foods has it for really cheap in their bulk bins. You can also substitute oat bran, or oat bran cereals for a slightly different flavor and texture. Don't be afraid to experiment...a little)
1 cup buttermilk (don't have buttermilk? Just use 1 cup of milk and 1 tablespoon lemon juice or white vinegar. Allow it to sit for a few minutes. The acidity is the most important factor that distinguishes buttermilk from regular milk. Interesting note - you can freeze extra buttermilk in 1 cup containers or plastic bags. You can also buy powdered buttermilk at the grocery store.)
1/3 cup vegetable oil (or substitute the same amount of applesauce)
1 egg
2/3 cup brown sugar
1/2 teaspoon vanilla extract
1 cup all-purpose flour
1 teaspoon baking soda
1 teaspoon baking powder
1/2 teaspoon salt
1/2 cup raisins (or any fruit,vegetable or nut you like. Just be mindful of the water content. If you add something really liquidy, you may need to add a little extra flour, or just reduce the amount of other liquids in the recipe (like the buttermilk). If you're not comfortable with baking, I recommend you make it with just raisins the first time. That way, you'll know what the consistency is supposed to be like).
DIRECTIONS
Preheat oven to 375 degrees F (190 degrees C). Grease muffin cups or line with paper muffin liners. (I prefer to grease muffin cups. Because of the lower fat content, these tend to stick to the paper liners).
Mix together wheat bran and buttermilk; let stand for 10 minutes.
Beat together oil, egg, sugar and vanilla and add to buttermilk/bran mixture. Sift together flour, baking soda, baking powder and salt. Stir flour mixture into buttermilk mixture, until just blended. Fold in raisins and spoon batter into prepared muffin tins.
Bake for 15 to 20 minutes, or until a toothpick inserted into the center of a muffin comes out clean. Cool and enjoy! (Incidentally, the first time I made them, that time worked fine, but the second time, it took 30 minutes, so you'll have to do the old toothpick test. Seriously, it's really handy. You stick a toothpick in the center and if it comes out clean, they're done. If it's got dough on it, then they're not done yet).
The Inaugural Post
Alright. So, God knows I suck at maintaining a blog, but I think part of the problem is that it's hard to find things to say sometimes. I mean, life is pretty much the same most days, with a few exciting events happening now and then to break the monotony. Who wants to read a blog that says, "Well, nothing new going on. Just the same old thing"? I love life, but honestly, when it comes down to the day to day, life is kinda boring...BUT on the other hand, for me, FOOD is always exciting and entertaining and captivating. I find myself cooking or baking something new almost every day (one of the benefits of being underemployed). And when I'm not doing it, I'm thinking about it. So, all that to say that hopefully, I will have enough "cooking news" to keep a FOODIE blog going.
Technically, I don't know if I really qualify as a "Foodie". I tend to think of that like as a kind of snobby person who's into "fine cuisine". Don't get me wrong. I LOVE fine cuisine. But at the same time, I also like pizza or a hot dog sometimes. And good old-fashioned comfort food rocks my world as well. BUT WAIT....news flash....
I just discovered Wikipedia's definition of Foodie and it goes like this...
"Foodie is an informal term for a particular class of aficionado of food and drink...Although the two terms are sometimes used interchangeably, foodies differ from gourmets in that gourmets are epicures of refined taste who may or may not be professionals in the food industry, whereas foodies are amateurs who simply love food for consumption, study, preparation, and news. Gourmets simply want to eat the best food, whereas foodies want to learn everything about food, both the best and the ordinary, and about the science, industry, and personalities surrounding food. For this reason, foodies are sometimes viewed as obsessively interested in all things culinary."
So, I guess I am a Foodie. It's official. Alright. Goodie for me. I've already done some baking today, so look for the first "real" post in a few minutes!
Subscribe to:
Posts (Atom)