In the spirit of the holidays, here's an incredible cookie recipe. Seriously, I LOVE these cookies. There's not a lot of stuff that I eat and immediately fall in love with. When I smelled them baking, I thought someone was baking a homemade pie. They have such a great (but pleasantly MILD) spice essence. They're NOT like ginger snaps. They're much more mellow. They're like sugar cookies with a Christmas-y twist. And the best part is, when I made the recipe at home, it came out just as good (no offense, Carrie - it was your baking of these that inspired me)! And the recipe is really quite easy. You MUST try them....
MOLASSES COOKIES
Note - this recipe card came with the "history" of the recipe, so I feel like I should include that here...in honor of those who made this recipe what it is and were kind enough to share it with future bakers: (Liz McFaul)->Mary Underwood->Carrie Valentine->Kat Michaels
Ingredients:
1 cup sugar plus more for rolling
¾ cup shortening
1 egg
4 Tbsp molasses
2 tsp baking soda
½ tsp salt
1 tsp cinnamon
1 tsp ginger
1 tsp cloves
Directions:
Using an electric mixer, first mix all ingredients except flour, then add in flour and mix a bit more (doesn’t take much mixing…probably about a minute, but I don’t suppose it would hurt to mix more – as long as all the ingredients are well combined). Place a couple of Tablespoons (or more) sugar on a small plate. Take the dough, and make into balls (about rounded Tablespoon sized). Roll each ball in sugar and place into a bowl. Chill the dough balls for about an hour (this prevents the cookies from coming out really flat).Then bake in a 350 degree oven for 10 to 15 minutes (my oven is pretty accurate and it took 15). This recipe made 28 cookies for me, but of course, it depends on how big you make the dough balls.
Saturday, November 22, 2008

Wednesday, November 19, 2008
Chunky Tomato Chicken Soup
Is it cold where you are? Well, it's...."cold".....here in LA (I had to put that in quotes because I realize it's extremely subjective). For us wimps on the left coast, it's a bit colder than it was a few weeks ago, so I guess we can call that fall. Anyhow, if it's at all cold where you are, then you'll really enjoy this one. Warning - it's a bit spicy. You can forgo or greatly reduce the chili powder if you don't like spice. And you can thank Julz for this one - she's my artsy, craftsy, cooking-ey, baking-ey friend.
CHUNKY TOMATO CHICKEN SOUP
Description:
Shredded chicken is added to a soup that combines canned tomatoes, tomato paste, black beans, and green chilies in a well-seasoned chicken broth. (It's basically a cross between chicken soup and chili).
Ingredients
1 pound boneless, skinless chicken breasts
Nonstick cooking spray
1 medium onion, chopped
3 cloves garlic, minced (I used a lot more (like 6 large cloves) because I like it. Tasted good to me!)
4 cups chicken broth (32 ounces, which is usually the size of a carton at the store)
Two 14 oz cans diced tomatoes
One 14 oz can black beans, drained and rinsed
One 6 oz can tomato paste
One 4 oz can diced green chilies (I got Ortega fire roasted mild. Use whatever kind you find - it's loose)
1 tsp chili powder (I used "Arbol" chili powder from the Mexican market. Julz used Cayenne pepper. Either way, I think it turned out quite spicy, so if you're not into spicy, either skip this ingredient, or just put a little dash)
1 tbsp ground cumin, or to taste
1 tsp white pepper (Whatever. I just used regular pepper. I'm not sure of the difference)
1 tbsp basil, dried (I used fresh, since I have a plant. In this case, I think the dried might be a better choice. With fresh, you have to use 3 times as much (literally - that's the conversion rate), and I don't think that in a soup, it really makes a difference).
1 tsp kosher salt (Again, a big "whatever" here. I used regular salt)
1/2 cup chopped fresh cilantro (this may be the last ingredient, but it REALLY adds a lot of yummy flavor, so don't skip it!)
Instructions:
Lightly spray a nonstick skillet with cooking spray. Cook chicken breasts until no pink remains. Remove chicken from pan and set aside to cool. Add onion and garlic to pan and cook just until onions start to sweat (I would cook them longer. I found that even after the recipe was totally done, the onions were not entirely soft. I don't like crunchy onions in my soup, so I would just go ahead and cook them until they're translucent, which will make them softer); remove from heat. In large stock pot combine onions, garlic, chicken broth, tomatoes, black beans, tomato paste, green chilies, chili powder, cumin, white pepper and salt. (The instructions seem to have left out the basil, so I went ahead and added it here with all the other ingredients. I'm not sure if that's the right time to add it, since the flavor cooks out of herbs so easily. It tasted good, so I guess the timing was okay). Stir well. Bring to a boil. Shred chicken into bite sized pieces and add to soup. Reduce heat to low and simmer for 15 minutes then turn off heat. Stir in fresh cilantro before serving. (I just stirred the fresh cilantro into the individual serving bowls. Really adds a great fresh flavor).
I served this soup with big chunky bread and butter. It definitely needs some sort of carbohydrate to go with it, in my opinion. You could also put some Fritos Corn Chips on it (my friend Mary makes a great "Taco Soup" that uses Fritos on top).
So, bundle up and enjoy this hot (in every sense of the word) soup! Farewell from frigid Southern California. ;-)
CHUNKY TOMATO CHICKEN SOUP
Description:
Shredded chicken is added to a soup that combines canned tomatoes, tomato paste, black beans, and green chilies in a well-seasoned chicken broth. (It's basically a cross between chicken soup and chili).
Ingredients
1 pound boneless, skinless chicken breasts
Nonstick cooking spray
1 medium onion, chopped
3 cloves garlic, minced (I used a lot more (like 6 large cloves) because I like it. Tasted good to me!)
4 cups chicken broth (32 ounces, which is usually the size of a carton at the store)
Two 14 oz cans diced tomatoes
One 14 oz can black beans, drained and rinsed
One 6 oz can tomato paste
One 4 oz can diced green chilies (I got Ortega fire roasted mild. Use whatever kind you find - it's loose)
1 tsp chili powder (I used "Arbol" chili powder from the Mexican market. Julz used Cayenne pepper. Either way, I think it turned out quite spicy, so if you're not into spicy, either skip this ingredient, or just put a little dash)
1 tbsp ground cumin, or to taste
1 tsp white pepper (Whatever. I just used regular pepper. I'm not sure of the difference)
1 tbsp basil, dried (I used fresh, since I have a plant. In this case, I think the dried might be a better choice. With fresh, you have to use 3 times as much (literally - that's the conversion rate), and I don't think that in a soup, it really makes a difference).
1 tsp kosher salt (Again, a big "whatever" here. I used regular salt)
1/2 cup chopped fresh cilantro (this may be the last ingredient, but it REALLY adds a lot of yummy flavor, so don't skip it!)
Instructions:
Lightly spray a nonstick skillet with cooking spray. Cook chicken breasts until no pink remains. Remove chicken from pan and set aside to cool. Add onion and garlic to pan and cook just until onions start to sweat (I would cook them longer. I found that even after the recipe was totally done, the onions were not entirely soft. I don't like crunchy onions in my soup, so I would just go ahead and cook them until they're translucent, which will make them softer); remove from heat. In large stock pot combine onions, garlic, chicken broth, tomatoes, black beans, tomato paste, green chilies, chili powder, cumin, white pepper and salt. (The instructions seem to have left out the basil, so I went ahead and added it here with all the other ingredients. I'm not sure if that's the right time to add it, since the flavor cooks out of herbs so easily. It tasted good, so I guess the timing was okay). Stir well. Bring to a boil. Shred chicken into bite sized pieces and add to soup. Reduce heat to low and simmer for 15 minutes then turn off heat. Stir in fresh cilantro before serving. (I just stirred the fresh cilantro into the individual serving bowls. Really adds a great fresh flavor).
I served this soup with big chunky bread and butter. It definitely needs some sort of carbohydrate to go with it, in my opinion. You could also put some Fritos Corn Chips on it (my friend Mary makes a great "Taco Soup" that uses Fritos on top).
So, bundle up and enjoy this hot (in every sense of the word) soup! Farewell from frigid Southern California. ;-)
Saturday, November 8, 2008
Learning By Osmosis?
Well, I'm still no expert, but I have to say, I've had a couple of "fly-by-the-seat-of-my-pants" cooking sessions lately and they both turned out great! And, some old classics that I was never good at have started to suddenly come out right. I'm thinking maybe all that watching of the Food Network has left some random knowledge in my brain.
So my latest exciting experiment that TOTALLY worked out was soup. Yes, soup - seems easy - seems boring - but it's NOT. It's always been an enigma to me. I'm just not a soup maker. I did make that tomato basil bisque a few months ago, but that was strictly following a recipe. And I think of bisque more like it's own category - as opposed to soup. I think of soup as liquid, vegetables, maybe some kind of grain or beans or something, and maybe some protein. I have never made soup, for whatever reason. It turned out SOOOO yummy - I was totally surprised, since I really didn't have any idea what I was doing. It was hot and savory, thick and chunky with veggies, and with a little parmesan grated over the top, it was DELICIOSO!
It all started because I had all these vegetables that I wanted to use up before they went bad - and I also had an opened container of chicken broth, which also needed to be used up. I didn't have onions, which would have been nice, but I did have garlic (always easy to keep around the house, because it lasts forever). So here's what I did ... mind you, I can hardly call it a true "recipe", since there aren't amounts, but consider it a guide.
Vegetable Soup with Orzo (all amounts are really approximate):
Into a large soup pot, I put 2 VERY large cloves of crushed garlic (probably the equvalent of at least 4 regular sized cloves). I added 3 Tbsp butter and melted it over very low heat, stirring constantly (garlic burns so easily). I added about 3 Tbsp (maybe a little more) of all purpose flour and stirred the mixture constantly while still over a low flame. Even though the flame was low, the mixture was sizzling pretty good the whole time (probably because the pot I used is fairly thin-bottomed. After about 3 minutes, I started adding the chicken broth (NOTE: I really don't have any idea how much chicken broth I used, but it doesn't really matter anyway. It depends on how chunky or liquidy or prefer your soup to be). So, I added the broth a little at a time, and mixing it in with the roux (FYI - roux is the flour/butter (and in this case, also garlic) mixture)). Once the mixture is all liquid, just pour the rest of the broth in.
Now for the veggies. I added what veggies I had (any number of veggies would work). I added 2 large carrots (sliced medium thick), celery (sliced pretty chunky - and you can also add the celery leaves...they add flavor), and a crown of brocolli (cut up into large bites). At this point, you should turn the heat up to high to heat up the liquid. I decided at this point that I should add some sort of grain or pasta, so I poured in a little orzo (about 1/3 cup, I think). Remember, orzo is pasta and it expands, so you don't need a ton of it. You're not making an "orzo dish". You just want a bit of pasta in your soup to add texture and substance. I also didn't feel like I had enough liquid in the pot, so I added about 2 or 3 cups of water. Stir as needed to mix up all the ingredients. You should be over high heat at this point to get the liquids hot again.
Flavoring - it's totally up to your taste, but I added some garlic salt, the crumbs on the bottom of my "Bay Leaf" spice jar, dried parsley, salt, pepper, seasoning salt, and a tiny bit of Worchestershire sauce (random, I know - it just struck me as tasty). And, I had some fresh cilantro that I wanted to use up as well, so I threw in about 20 to 30 whole cilantro leaves. Once the mixture boiled, I turned the heat back down to low and put a lid on the pot. I let it simmer for about 20 to 30 minutes.
To serve, you can grate fresh parmesan or other cheese over the top. I also threw some of the fresh cilantro on top. Yummm!
So my latest exciting experiment that TOTALLY worked out was soup. Yes, soup - seems easy - seems boring - but it's NOT. It's always been an enigma to me. I'm just not a soup maker. I did make that tomato basil bisque a few months ago, but that was strictly following a recipe. And I think of bisque more like it's own category - as opposed to soup. I think of soup as liquid, vegetables, maybe some kind of grain or beans or something, and maybe some protein. I have never made soup, for whatever reason. It turned out SOOOO yummy - I was totally surprised, since I really didn't have any idea what I was doing. It was hot and savory, thick and chunky with veggies, and with a little parmesan grated over the top, it was DELICIOSO!
It all started because I had all these vegetables that I wanted to use up before they went bad - and I also had an opened container of chicken broth, which also needed to be used up. I didn't have onions, which would have been nice, but I did have garlic (always easy to keep around the house, because it lasts forever). So here's what I did ... mind you, I can hardly call it a true "recipe", since there aren't amounts, but consider it a guide.
Vegetable Soup with Orzo (all amounts are really approximate):
Into a large soup pot, I put 2 VERY large cloves of crushed garlic (probably the equvalent of at least 4 regular sized cloves). I added 3 Tbsp butter and melted it over very low heat, stirring constantly (garlic burns so easily). I added about 3 Tbsp (maybe a little more) of all purpose flour and stirred the mixture constantly while still over a low flame. Even though the flame was low, the mixture was sizzling pretty good the whole time (probably because the pot I used is fairly thin-bottomed. After about 3 minutes, I started adding the chicken broth (NOTE: I really don't have any idea how much chicken broth I used, but it doesn't really matter anyway. It depends on how chunky or liquidy or prefer your soup to be). So, I added the broth a little at a time, and mixing it in with the roux (FYI - roux is the flour/butter (and in this case, also garlic) mixture)). Once the mixture is all liquid, just pour the rest of the broth in.
Now for the veggies. I added what veggies I had (any number of veggies would work). I added 2 large carrots (sliced medium thick), celery (sliced pretty chunky - and you can also add the celery leaves...they add flavor), and a crown of brocolli (cut up into large bites). At this point, you should turn the heat up to high to heat up the liquid. I decided at this point that I should add some sort of grain or pasta, so I poured in a little orzo (about 1/3 cup, I think). Remember, orzo is pasta and it expands, so you don't need a ton of it. You're not making an "orzo dish". You just want a bit of pasta in your soup to add texture and substance. I also didn't feel like I had enough liquid in the pot, so I added about 2 or 3 cups of water. Stir as needed to mix up all the ingredients. You should be over high heat at this point to get the liquids hot again.
Flavoring - it's totally up to your taste, but I added some garlic salt, the crumbs on the bottom of my "Bay Leaf" spice jar, dried parsley, salt, pepper, seasoning salt, and a tiny bit of Worchestershire sauce (random, I know - it just struck me as tasty). And, I had some fresh cilantro that I wanted to use up as well, so I threw in about 20 to 30 whole cilantro leaves. Once the mixture boiled, I turned the heat back down to low and put a lid on the pot. I let it simmer for about 20 to 30 minutes.
To serve, you can grate fresh parmesan or other cheese over the top. I also threw some of the fresh cilantro on top. Yummm!
Sunday, November 2, 2008
Roasting chicken, making gravy and the virtues of Jon's Market
Sorry it's been a while, folks. THAT is what happens when you have to go work the 9 to 5. I did a 3 week stint in an office, to help pay the bills. But now I am free once again, and I'm back to cooking and baking. I did the usual weekly bran muffin thing, which is always yummy and totally convenient (I freeze most of them and just take one out the night before I think we'll eat it.) And, last night I roasted a chicken. Sounds not so exciting, but I NEVER do that. I just don't, for whatever reason. But this week, I saw a great deal on whole Foster Farms chickens at Jon's market (I got mine for $3.50 - ridiculous). Anyway, it was good, but the lessons learned from that were:
#1, roasting a chicken is really not worth the trouble (seasoning and generally handling a raw bird). Especially not worth it when you consider that you can get a great cooked chicken at Costco for about 5 or 6 dollars. There's not really that much good, edible meat on a small bird, so why go to the trouble? And the clean up is a lot, too. Anyhow, it was tasty, but not really worth it.
#2, don't trust the cooking times on recipes when it comes to whole birds. It took me an hour longer than the recipe called for (at 75 degrees HIGHER than the recipe called for - it wanted 325, but I knew it would probably take 375 or 400 - and it STILL took a lot longer).
#3, if you choose to put brocolli in with your roasting bird....don't. For whatever reason, it just dries out and gets crispy. The celery, onion and carrot were GREAT - soft and tender, but the brocolli didn't really work that way. I guess it would have been better just to steam some brocolli on the side.
On the bright side, the meal was pretty tasty and my gravy turned out FANTASTIC! It was really easy and for the first time, I feel like I got the right directions and it worked great. Here's the scoop for gravy...
1. Place the roasting pan with the drippings on the stovetop. don't just take the drippings out - the stuff that's stuck to the bottom of the pan is what makes the gravy taste really yummy. Pour in a little chicken stock (or if there's plenty of drippings in there already, don't worry about adding liquid. Stir it while it's heating and make sure to gently scrape up the bits stuck to the bottom of the pan (be careful when using metal utensils - make sure your roasting pan can handle it.
2. While that's gently heating, in a separate saucepan, melt some butter (a couple of tablespoons - more if you're making a huge turkey or something) and add some flour (2 or 3 tablespoons - it's loose). Mix the flour and butter to get a rue and heat it over medium heat until the butter/flour mixture browns a bit (3 minutes or so) - stirring often to prevent burning. Gradually add the sauce mixture from the roasting pan to the flour mixture, stirring constantly. It should thicken rather quickly. Stir until it thickens to your liking. Season with salt and pepper to taste and VOILA! Gravy.
An alternative to plain chicken stock...I actually boiled the giblets in chicken stock (with onions, celery, salt and pepper) for about an hour (all except the liver), then added the liver and boiled another 20 minutes or so. I then strained that mixture so only the broth was left. That's what I used to heat up and loosen the bits on the bottom of the roasting pan. Yummy - and not a bit ...Giblet-y . It's just a flavoring thing. Makes the broth savory.
One last thing I must mention. If you haven't been already (this is for LA locals only) - you must go to Jon's Market. They have the best prices on produce. It's ridiculous, really. My receipt read like this....Onions, 20 cents - garlic, 10 cents - 2 red bell peppers, $1.00 - celery, 50 cents - cilantro - 50 cents. Persimmons were on sale - 2 pounds for $100. I got a giant bag of persimmons for $1.00. They're like $1.50 per pound at the store (when they're on SALE). I usually stay away from the meat section (the meat's fine, but the other things they sell freak me out - like chicken feet and intestines and stuff) - shudder. This time, however, I ventured over there and found some good looking meat (and chicken), at really excellent prices. And their other products (every day household things, soft drinks, etc) - are not very cheap, so don't bother. Also, their spices are super cheap - great place to go for spices.
One last note for you - I used my new tortilla press to make corn tortillas. I am VERY EXCITED! It makes the whole process super easy and fun. And my tortillas look perfect. Yay for the tortilla press! (and I made some simple chicken enchiladas with the leftover chicken - best EVER!)
Later!
#1, roasting a chicken is really not worth the trouble (seasoning and generally handling a raw bird). Especially not worth it when you consider that you can get a great cooked chicken at Costco for about 5 or 6 dollars. There's not really that much good, edible meat on a small bird, so why go to the trouble? And the clean up is a lot, too. Anyhow, it was tasty, but not really worth it.
#2, don't trust the cooking times on recipes when it comes to whole birds. It took me an hour longer than the recipe called for (at 75 degrees HIGHER than the recipe called for - it wanted 325, but I knew it would probably take 375 or 400 - and it STILL took a lot longer).
#3, if you choose to put brocolli in with your roasting bird....don't. For whatever reason, it just dries out and gets crispy. The celery, onion and carrot were GREAT - soft and tender, but the brocolli didn't really work that way. I guess it would have been better just to steam some brocolli on the side.
On the bright side, the meal was pretty tasty and my gravy turned out FANTASTIC! It was really easy and for the first time, I feel like I got the right directions and it worked great. Here's the scoop for gravy...
1. Place the roasting pan with the drippings on the stovetop. don't just take the drippings out - the stuff that's stuck to the bottom of the pan is what makes the gravy taste really yummy. Pour in a little chicken stock (or if there's plenty of drippings in there already, don't worry about adding liquid. Stir it while it's heating and make sure to gently scrape up the bits stuck to the bottom of the pan (be careful when using metal utensils - make sure your roasting pan can handle it.
2. While that's gently heating, in a separate saucepan, melt some butter (a couple of tablespoons - more if you're making a huge turkey or something) and add some flour (2 or 3 tablespoons - it's loose). Mix the flour and butter to get a rue and heat it over medium heat until the butter/flour mixture browns a bit (3 minutes or so) - stirring often to prevent burning. Gradually add the sauce mixture from the roasting pan to the flour mixture, stirring constantly. It should thicken rather quickly. Stir until it thickens to your liking. Season with salt and pepper to taste and VOILA! Gravy.
An alternative to plain chicken stock...I actually boiled the giblets in chicken stock (with onions, celery, salt and pepper) for about an hour (all except the liver), then added the liver and boiled another 20 minutes or so. I then strained that mixture so only the broth was left. That's what I used to heat up and loosen the bits on the bottom of the roasting pan. Yummy - and not a bit ...Giblet-y . It's just a flavoring thing. Makes the broth savory.
One last thing I must mention. If you haven't been already (this is for LA locals only) - you must go to Jon's Market. They have the best prices on produce. It's ridiculous, really. My receipt read like this....Onions, 20 cents - garlic, 10 cents - 2 red bell peppers, $1.00 - celery, 50 cents - cilantro - 50 cents. Persimmons were on sale - 2 pounds for $100. I got a giant bag of persimmons for $1.00. They're like $1.50 per pound at the store (when they're on SALE). I usually stay away from the meat section (the meat's fine, but the other things they sell freak me out - like chicken feet and intestines and stuff) - shudder. This time, however, I ventured over there and found some good looking meat (and chicken), at really excellent prices. And their other products (every day household things, soft drinks, etc) - are not very cheap, so don't bother. Also, their spices are super cheap - great place to go for spices.
One last note for you - I used my new tortilla press to make corn tortillas. I am VERY EXCITED! It makes the whole process super easy and fun. And my tortillas look perfect. Yay for the tortilla press! (and I made some simple chicken enchiladas with the leftover chicken - best EVER!)
Later!
Thursday, October 2, 2008
Cheese Enchiladas (and Sauce)
Ugh - so many recipes...so little time. Sorry it's been a little while since the last post. I'm still continuing on the Mexican theme. I LOVE enchiladas and yes, chicken and beef are fine, but for me, it's all about the cheese. I love me my cheese - I gotta have me some cheese. So, this recipe is for cheese enchiladas. I actually am including a recipe for homemade enchilada sauce, too, but frankly, I didn't like it as much as the stuff from the store. It's good, but different than what I'm used to. I recommend just using store-bought, but I included the recipe in case you want to try it. Here ya go!
Cheese Enchiladas
Ingredients:
1 lb of mild cheddar cheese, grated
corn tortillas
vegetable oil
1/4-1/3 cup finely chopped yellow onion (optional)
Enchilada sauce, heated
black olives (sliced)
sour cream, optional
guacamole, optional
Directions: (all this stuff about dipping the tortillas in oil is something I tried once and found to be kind of useless. Most recipes say to do this, so I'll leave it in here in case you want to do the whole "shebang", but for me, dipping in hot enchilada sauce was enough to soften the tortilla).
Heat the vegetable oil in a frying pan on medium heat. You will need some tongs and a plate or tray to assemble your enchiladas. Using tongs, dip two corn tortillas at a time into the hot oil. When the tortillas start to bubble, lift and dip them into the oil 3 times fairly quickly. The goal here is to make the tortillas soft. If the tortillas are left in the oil too long they will get hard and be difficult to roll. If that happens just toss them out and start over. The other option is to go ahead and keep cooking them in the oil until they become hard. These can be used as tostada shells if you like.
Okay, back to dipping the tortillas 3 quick times in the oil. Once you do this, dip the tortillas into hot enchilada sauce to coat. Now put the tortillas on a plate to cool one minute. Add a handfull of the grated cheese and sprinkle some onion down the center of one tortilla and roll it. (you can also add some sliced olives before you roll it). Do this by grabbing one end of the tortilla and bringing it 3/4 of the way over to the other end. Tuck and roll the tortilla. Pick up the cheese enchilada with your fore fingers on the botton where the seam is. Let your pinky fingers cover the ends of the enchilada to keep the cheese from falling out while you move it to an oven proof dish.
Pour hot enchilada sauce over the top of the cheese enchiladas and let plenty of sauce run down the sides. Remember, the sauce is what makes it!
Sprinkle more cheese and onion on top in the desired amount.
Preheat the oven to 400 degrees and place your enchiladas in the oven. Heat the cheese enchiladas until they look somewhat flat and the sauce is bubbling. This will probably take 15 minutes or more. Remember, you want to make sure the cheese inside the enchilada is melted.
Enchilada Sauce - Red
Ingredient
1 tablespoon olive oil
2 cloves garlic, minced
1 teaspoon minced onion
1/2 teaspoon dried oregano
2 1/2 teaspoons chili powder (I went to a hispanic market and got some really cheap (like 50 cents for a bag) - I just asked someone that worked there WHICH chili powder would be good for enchilada sauce. There are a LOT of choices of chili power, believe it or not).
1/2 teaspoon dried basil
1/8 teaspoon ground black pepper
1/8 teaspoon salt
1/4 teaspoon ground cumin
1 teaspoon dried parsley
1/4 cup salsa
1 (6 ounce) can tomato sauce
1 1/2 cups water
Directions
1. Heat the oil in a large saucepan over medium heat. Add the garlic and sauté for 1 to 2 minutes. Add the onion, oregano, chili powder, basil, ground black pepper, salt, cumin, parsley, salsa and tomato sauce.
2. Mix together and then stir in the water. Bring to a boil, reduce heat to low and simmer for 15 to 20 minutes.
Cheese Enchiladas
Ingredients:
1 lb of mild cheddar cheese, grated
corn tortillas
vegetable oil
1/4-1/3 cup finely chopped yellow onion (optional)
Enchilada sauce, heated
black olives (sliced)
sour cream, optional
guacamole, optional
Directions: (all this stuff about dipping the tortillas in oil is something I tried once and found to be kind of useless. Most recipes say to do this, so I'll leave it in here in case you want to do the whole "shebang", but for me, dipping in hot enchilada sauce was enough to soften the tortilla).
Heat the vegetable oil in a frying pan on medium heat. You will need some tongs and a plate or tray to assemble your enchiladas. Using tongs, dip two corn tortillas at a time into the hot oil. When the tortillas start to bubble, lift and dip them into the oil 3 times fairly quickly. The goal here is to make the tortillas soft. If the tortillas are left in the oil too long they will get hard and be difficult to roll. If that happens just toss them out and start over. The other option is to go ahead and keep cooking them in the oil until they become hard. These can be used as tostada shells if you like.
Okay, back to dipping the tortillas 3 quick times in the oil. Once you do this, dip the tortillas into hot enchilada sauce to coat. Now put the tortillas on a plate to cool one minute. Add a handfull of the grated cheese and sprinkle some onion down the center of one tortilla and roll it. (you can also add some sliced olives before you roll it). Do this by grabbing one end of the tortilla and bringing it 3/4 of the way over to the other end. Tuck and roll the tortilla. Pick up the cheese enchilada with your fore fingers on the botton where the seam is. Let your pinky fingers cover the ends of the enchilada to keep the cheese from falling out while you move it to an oven proof dish.
Pour hot enchilada sauce over the top of the cheese enchiladas and let plenty of sauce run down the sides. Remember, the sauce is what makes it!
Sprinkle more cheese and onion on top in the desired amount.
Preheat the oven to 400 degrees and place your enchiladas in the oven. Heat the cheese enchiladas until they look somewhat flat and the sauce is bubbling. This will probably take 15 minutes or more. Remember, you want to make sure the cheese inside the enchilada is melted.
Enchilada Sauce - Red
Ingredient
1 tablespoon olive oil
2 cloves garlic, minced
1 teaspoon minced onion
1/2 teaspoon dried oregano
2 1/2 teaspoons chili powder (I went to a hispanic market and got some really cheap (like 50 cents for a bag) - I just asked someone that worked there WHICH chili powder would be good for enchilada sauce. There are a LOT of choices of chili power, believe it or not).
1/2 teaspoon dried basil
1/8 teaspoon ground black pepper
1/8 teaspoon salt
1/4 teaspoon ground cumin
1 teaspoon dried parsley
1/4 cup salsa
1 (6 ounce) can tomato sauce
1 1/2 cups water
Directions
1. Heat the oil in a large saucepan over medium heat. Add the garlic and sauté for 1 to 2 minutes. Add the onion, oregano, chili powder, basil, ground black pepper, salt, cumin, parsley, salsa and tomato sauce.
2. Mix together and then stir in the water. Bring to a boil, reduce heat to low and simmer for 15 to 20 minutes.
Wednesday, September 17, 2008
Sweet Corn Tomalito - Just like Chevy's - YUMMM!!!
Anyone go to Chevy's? You know, the Mexican Restaurant? They have this corn stuff that comes with most meals - it's called Sweet Corn Tomalito. It's sooo good, but they only give you like a tablespoon of it, if you're lucky. Well, now you can make it yourself...at home....and eat as much as you like! And, like I promised you....I actually took pictures. Here it is...


Sweet Corn Tomalito
Ingredients:
5 Tbsp. butter, softened
1/4 cup masa (corn flour) (Remember, this is the same stuff you used to make flour tortillas. It's NOT cornmeal - it's corn FLOUR - you can get it at many large supermarkets and any ethnic market).
1/3 cup sugar
1/2 cup water
2 cups corn kernels, fresh or frozen, thawed
1/2 cup cornmeal
1 tsp. baking powder
1/2 tsp. salt
2 Tbsp. plus 1 tsp. milk
Directions:
1. In a small mixing bowl, mix the butter, masa, and sugar using an electirc mixer until light and fluffy. About 1 minute.
2. In a blender, blend half of the corn kernels with the water until smooth.
3. Combine this mixture with the butter mixture, stirring well.
4. Add the remaining corn kerrnels, corn meal, baking powder, salt and milk and mix well.
5. Pour the corn mixture into an 8 inch square baking pan. tightly cover with foil. Steam by setting atop a medium sauce pan of water on top of the stove. Bring water to a boil and steam corn mixture for 50 minutes to one hour. Keep an eye on the water, you may need to add more. (There are other methods for cooking. Apparently, the "Chevy's Cookbook" says you can preheat oven 250 degree F. Place covered dish in a larger roasting pan filled with so water is 3/4 of inch up side of baking dish. Bake for 1 1/2 to 2 hours. I'm sure you can use a double boiler. That's basically what I did, but since I didn't have a double boiler, I lined the steamer basket of a pot/basket set - see the pictures.)
6. It is done when a toothpick inserted in the center comes out clean. Tomalito should have a smooth, moist texture.
* Note: the pan must be tightly wrapped at all times.


Sweet Corn Tomalito
Ingredients:
5 Tbsp. butter, softened
1/4 cup masa (corn flour) (Remember, this is the same stuff you used to make flour tortillas. It's NOT cornmeal - it's corn FLOUR - you can get it at many large supermarkets and any ethnic market).
1/3 cup sugar
1/2 cup water
2 cups corn kernels, fresh or frozen, thawed
1/2 cup cornmeal
1 tsp. baking powder
1/2 tsp. salt
2 Tbsp. plus 1 tsp. milk
Directions:
1. In a small mixing bowl, mix the butter, masa, and sugar using an electirc mixer until light and fluffy. About 1 minute.
2. In a blender, blend half of the corn kernels with the water until smooth.
3. Combine this mixture with the butter mixture, stirring well.
4. Add the remaining corn kerrnels, corn meal, baking powder, salt and milk and mix well.
5. Pour the corn mixture into an 8 inch square baking pan. tightly cover with foil. Steam by setting atop a medium sauce pan of water on top of the stove. Bring water to a boil and steam corn mixture for 50 minutes to one hour. Keep an eye on the water, you may need to add more. (There are other methods for cooking. Apparently, the "Chevy's Cookbook" says you can preheat oven 250 degree F. Place covered dish in a larger roasting pan filled with so water is 3/4 of inch up side of baking dish. Bake for 1 1/2 to 2 hours. I'm sure you can use a double boiler. That's basically what I did, but since I didn't have a double boiler, I lined the steamer basket of a pot/basket set - see the pictures.)
6. It is done when a toothpick inserted in the center comes out clean. Tomalito should have a smooth, moist texture.
* Note: the pan must be tightly wrapped at all times.
Friday, September 12, 2008
Flan and Meringues
While we're on the Mexican thing - let's do flan. I actually went out and bought little ramekins (AKA - cute little individual-sized ceramic baking dishes). Granted, I was going to go shopping at the cooking store anyway (birthday money...what else?). So, along with a bunch of other great stuff, I got these little dishes just for this very purpose.
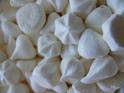 And what's the deal with my title - "Flan and Meringues"? Well, flan uses 10 egg yolks. I HATE wasting food. So, what are you supposed to do with all the egg whites? You could freeze them in a baggie (I do that all the time), or better yet, why not make Meringues? They are sooo yummy and so easy and you get so messy (FUN and delicious messy) while you're making them. AND, if you keep them in an airtight container, they last FOREVER. So, I'll post the recipe below. I used a decorating tip (you can use a cookie press, too) and they came out looking perfect - just like the ones from Trader Joe's. This picture is NOT of my meringues (actually, mine looked even MORE perfect...yes, I'm bragging).
Unfortunately, I didn't take a picture of the flan either, so you'll have to imagine it. Or look it up online - there must be a thousand pictures out there. I promise to be better in the future about taking pictures of my creations.
I had never made custard before, so this was definitely a new adventure for me. All in all, it turned out well. I don't really get the part where you turn the custard out onto a dish and a bunch of VERY hard, carmelized sugar remains in the baking dish. I mean, a nice amount comes out and drips down the sides of the custard, but still.... a lot of it just stays in the dish. In fact, I had a heck of a time trying to figure out how to get it out. You can't break it with a knife (it's THAT hard). You can't really hit it with a hammer (it's in a ceramic dish, mind you). But what did end up working like a charm for this clean-up job was very hot water. My tap, fortunately, produces REALLY hot, steaming water. I just ran that in the dish for a minute or so and it re-melted and washed away all that sticky caramel. If you don't have really hot tap water, I'm not sure what to tell you. Letting boiled water sit in the dish might work, but it has to be repeated several times (boil, soak, rinse, etc). Not sure why that is. But the running hot water definitely worked like a charm.
WHY am I even talking this much about cleanup when you haven't even had a chance to enjoy the product. I gave some to my neighbors (one of whom is hispanic) and they said it was the best flan they had ever had - ANYWHERE! By far. I'm not bragging (I didn't invent it, after all). But I'm just saying - this is really, really good and your PEOPLE (friends, family, neighbors) will love it. Next time, maybe the enchiladas recipe...how's that sound? But for now...here's the flan -
Flan
INGREDIENTS:
10 egg yolks
1 (14 ounce) can sweetened condensed milk
1 (12 ounce) can evaporated milk
1 to 1/2 cups sugar
(maybe 1 tsp vanilla if you want) (I did add vanilla and it was great)
DIRECTIONS:
1. Preheat oven to 325 degrees. You will need 6 ramekins or other specialty flan cook ware and a large baking pan to put them in.
2. Pour sugar in warm pan over medium heat. (Be REALLY careful with the heat here. It's a fine line between carmelized sugar and burnt sugar. In fact, mine was a tiny bit bitter, which means it was a bit burnt. It still tasted great, but it could easily have been ruined. Keep the heat fairly low - better safe than sorry). Don’t stir sugar, but swirl sugar around until it browns and becomes caramel. (The point of not stirring the sugar has to do with the fact that you don't want to stir the non-melted sugar (like some that may be stuck on the side of the pan) into the melted sugar. I guess it throws off the whole process. Let it melt together as it naturally wants to - don't force it. Frankly, I think I stirred it a bit toward the end, and it was fine - just be aware). Quickly pour approximately 2-3 tablespoons of caramel in each ramekin, tilting it to swirl the caramel around the sides. Reheat caramel if it starts to harden (other recipes say to let the caramel harden in the bottom of the ramekins before pouring the custard in. I say it doesn't matter. It will melt when it's cooking anyway).
3. Whisk together the yolks, condensed milk, and evaporated milk (and vanilla if you want); set aside.
4. Pour custard into caramel lined ramekins. Place ramekins in a large glass or ceramic baking dish and fill with about 1-2 inches of hot water. Bake for 45 minutes in the water bath and check with a knife just to the side of the center. If knife comes out clean, it's ready.
5. Remove and let cool. Let each ramekin cool in refrigerator for 1 hour (this is a little tricky. You HAVE to wait for the custard to harden. But don't wait forever, because the caramel sauce has to still be a liquid. Some of mine took longer than an hour. Like I said, the custard HAS to be set (that's not optional), so that should be your guide as to when to turn the custard out on to a plate. Also, I found that it helps to run a sharp knife around the outside edge of the custard before you turn it over - it comes out smoothly). Invert each ramekin onto a small plate, the caramel sauce will flow over the custard.
Authentic French Meringues
(I did this recipe times 2 1/2, so I could use up my 10 egg whites. You will need at least 2 LARGE baking sheets to fit all the meringues this makes)
INGREDIENTS:
4 egg whites
2 1/4 cups confectioners' sugar
DIRECTIONS: (Please read all the tips at the bottom first - they really help).
Preheat the oven to 200 degrees F (95 degrees C). Butter and flour a baking sheet (for this particular recipe, I really did butter and flour the baking sheets, as opposed to using PAM. I figured that since egg whites are so delicate and have little flavor of their own, they would probably pick up the flavor of the PAM, which I wouldn't want. Now, butter, on the other hand, tastes great, so that was my choice.)
In a glass or metal bowl, whip egg whites until foamy using an electric mixer. Sprinkle in sugar a little at a time, while continuing to whip at medium speed. When the mixture becomes stiff and shiny like satin, stop mixing, and transfer the mixture to a large pastry bag. Pipe the meringue out onto the prepared baking sheet using a large round tip or star tip. (If you don't have a fancy thing to pipe out the meringue, just use a spoon and make a dollop (AKA "a plop") on the baking sheet).
Place the meringues in the oven and place a wooden spoon handle in the door to keep it from closing all the way. Bake for 3 hours, or until the meringues are dry, and can easily be removed from the pan. (it only took me just a little over 2 hours - check once in a while and taste one to see if it's done to your liking - this is pretty loose, since they'll either be dry, or dryer. That's the nature of a meringue. You can't over dry them, I don't think. But I suppose you could burn the bottoms, so that' a good reason to check on them after a couple of hours. If the bottoms are getting brown, they're either done or your oven's too hot). Allow cookies to cool completely before storing in an airtight container at room temperature.
EGG WHITE TIPS:
1. Use a clean, dry bowl. The bowl must be grease-free, because any trace amount of fat will wreck a meringue. Glass, ceramic, stainless steel, and copper bowls are all suitable. Plastic bowls may appear clean, but may still have trace amounts of oil, so do not use them.
2. Cold eggs separate easily, but eggs whip to a higher volume when at room temperature. The solution is to separate the cold eggs, and then set them aside for 10 or 15 minutes.
3. Separate each egg into two small bowls, one for the white and one for the yolk, and then add the white portion to the larger bowl. This allows you to reserve any with broken yolks for another purpose. Even a small amount of yolk can deflate the egg whites, so be careful.
TIPS For A Basic Meringue:
Cream of tartar, white vinegar, or lemon juice can all be used to stabilize a meringue.
1. Add 1/8 teaspoon of cream of tartar per egg white to the unbeaten eggs. (If you're using a copper bowl to make your meringue, don't add any acid: it can react with the copper and discolor the egg foam.) (I used a dash of lemon juice - just a small dash (maybe a Tbsp) - it worked well and I knew that even if a little tiny bit of lemon flavor remained in the finished product, it wouldn't bother me. As it turns out, no lemon flavor remained - it was just pure sugar!)
2. Whip to medium-soft peaks. Beat in 2 tablespoons white sugar per egg white. Continue to beat until egg whites are glossy and hold a firm peak.
3. Adding sugar early in the beating process results in a firmer, finer-textured meringue.
 And what's the deal with my title - "Flan and Meringues"? Well, flan uses 10 egg yolks. I HATE wasting food. So, what are you supposed to do with all the egg whites? You could freeze them in a baggie (I do that all the time), or better yet, why not make Meringues? They are sooo yummy and so easy and you get so messy (FUN and delicious messy) while you're making them. AND, if you keep them in an airtight container, they last FOREVER. So, I'll post the recipe below. I used a decorating tip (you can use a cookie press, too) and they came out looking perfect - just like the ones from Trader Joe's. This picture is NOT of my meringues (actually, mine looked even MORE perfect...yes, I'm bragging).
Unfortunately, I didn't take a picture of the flan either, so you'll have to imagine it. Or look it up online - there must be a thousand pictures out there. I promise to be better in the future about taking pictures of my creations.
I had never made custard before, so this was definitely a new adventure for me. All in all, it turned out well. I don't really get the part where you turn the custard out onto a dish and a bunch of VERY hard, carmelized sugar remains in the baking dish. I mean, a nice amount comes out and drips down the sides of the custard, but still.... a lot of it just stays in the dish. In fact, I had a heck of a time trying to figure out how to get it out. You can't break it with a knife (it's THAT hard). You can't really hit it with a hammer (it's in a ceramic dish, mind you). But what did end up working like a charm for this clean-up job was very hot water. My tap, fortunately, produces REALLY hot, steaming water. I just ran that in the dish for a minute or so and it re-melted and washed away all that sticky caramel. If you don't have really hot tap water, I'm not sure what to tell you. Letting boiled water sit in the dish might work, but it has to be repeated several times (boil, soak, rinse, etc). Not sure why that is. But the running hot water definitely worked like a charm.
WHY am I even talking this much about cleanup when you haven't even had a chance to enjoy the product. I gave some to my neighbors (one of whom is hispanic) and they said it was the best flan they had ever had - ANYWHERE! By far. I'm not bragging (I didn't invent it, after all). But I'm just saying - this is really, really good and your PEOPLE (friends, family, neighbors) will love it. Next time, maybe the enchiladas recipe...how's that sound? But for now...here's the flan -
Flan
INGREDIENTS:
10 egg yolks
1 (14 ounce) can sweetened condensed milk
1 (12 ounce) can evaporated milk
1 to 1/2 cups sugar
(maybe 1 tsp vanilla if you want) (I did add vanilla and it was great)
DIRECTIONS:
1. Preheat oven to 325 degrees. You will need 6 ramekins or other specialty flan cook ware and a large baking pan to put them in.
2. Pour sugar in warm pan over medium heat. (Be REALLY careful with the heat here. It's a fine line between carmelized sugar and burnt sugar. In fact, mine was a tiny bit bitter, which means it was a bit burnt. It still tasted great, but it could easily have been ruined. Keep the heat fairly low - better safe than sorry). Don’t stir sugar, but swirl sugar around until it browns and becomes caramel. (The point of not stirring the sugar has to do with the fact that you don't want to stir the non-melted sugar (like some that may be stuck on the side of the pan) into the melted sugar. I guess it throws off the whole process. Let it melt together as it naturally wants to - don't force it. Frankly, I think I stirred it a bit toward the end, and it was fine - just be aware). Quickly pour approximately 2-3 tablespoons of caramel in each ramekin, tilting it to swirl the caramel around the sides. Reheat caramel if it starts to harden (other recipes say to let the caramel harden in the bottom of the ramekins before pouring the custard in. I say it doesn't matter. It will melt when it's cooking anyway).
3. Whisk together the yolks, condensed milk, and evaporated milk (and vanilla if you want); set aside.
4. Pour custard into caramel lined ramekins. Place ramekins in a large glass or ceramic baking dish and fill with about 1-2 inches of hot water. Bake for 45 minutes in the water bath and check with a knife just to the side of the center. If knife comes out clean, it's ready.
5. Remove and let cool. Let each ramekin cool in refrigerator for 1 hour (this is a little tricky. You HAVE to wait for the custard to harden. But don't wait forever, because the caramel sauce has to still be a liquid. Some of mine took longer than an hour. Like I said, the custard HAS to be set (that's not optional), so that should be your guide as to when to turn the custard out on to a plate. Also, I found that it helps to run a sharp knife around the outside edge of the custard before you turn it over - it comes out smoothly). Invert each ramekin onto a small plate, the caramel sauce will flow over the custard.
Authentic French Meringues
(I did this recipe times 2 1/2, so I could use up my 10 egg whites. You will need at least 2 LARGE baking sheets to fit all the meringues this makes)
INGREDIENTS:
4 egg whites
2 1/4 cups confectioners' sugar
DIRECTIONS: (Please read all the tips at the bottom first - they really help).
Preheat the oven to 200 degrees F (95 degrees C). Butter and flour a baking sheet (for this particular recipe, I really did butter and flour the baking sheets, as opposed to using PAM. I figured that since egg whites are so delicate and have little flavor of their own, they would probably pick up the flavor of the PAM, which I wouldn't want. Now, butter, on the other hand, tastes great, so that was my choice.)
In a glass or metal bowl, whip egg whites until foamy using an electric mixer. Sprinkle in sugar a little at a time, while continuing to whip at medium speed. When the mixture becomes stiff and shiny like satin, stop mixing, and transfer the mixture to a large pastry bag. Pipe the meringue out onto the prepared baking sheet using a large round tip or star tip. (If you don't have a fancy thing to pipe out the meringue, just use a spoon and make a dollop (AKA "a plop") on the baking sheet).
Place the meringues in the oven and place a wooden spoon handle in the door to keep it from closing all the way. Bake for 3 hours, or until the meringues are dry, and can easily be removed from the pan. (it only took me just a little over 2 hours - check once in a while and taste one to see if it's done to your liking - this is pretty loose, since they'll either be dry, or dryer. That's the nature of a meringue. You can't over dry them, I don't think. But I suppose you could burn the bottoms, so that' a good reason to check on them after a couple of hours. If the bottoms are getting brown, they're either done or your oven's too hot). Allow cookies to cool completely before storing in an airtight container at room temperature.
EGG WHITE TIPS:
1. Use a clean, dry bowl. The bowl must be grease-free, because any trace amount of fat will wreck a meringue. Glass, ceramic, stainless steel, and copper bowls are all suitable. Plastic bowls may appear clean, but may still have trace amounts of oil, so do not use them.
2. Cold eggs separate easily, but eggs whip to a higher volume when at room temperature. The solution is to separate the cold eggs, and then set them aside for 10 or 15 minutes.
3. Separate each egg into two small bowls, one for the white and one for the yolk, and then add the white portion to the larger bowl. This allows you to reserve any with broken yolks for another purpose. Even a small amount of yolk can deflate the egg whites, so be careful.
TIPS For A Basic Meringue:
Cream of tartar, white vinegar, or lemon juice can all be used to stabilize a meringue.
1. Add 1/8 teaspoon of cream of tartar per egg white to the unbeaten eggs. (If you're using a copper bowl to make your meringue, don't add any acid: it can react with the copper and discolor the egg foam.) (I used a dash of lemon juice - just a small dash (maybe a Tbsp) - it worked well and I knew that even if a little tiny bit of lemon flavor remained in the finished product, it wouldn't bother me. As it turns out, no lemon flavor remained - it was just pure sugar!)
2. Whip to medium-soft peaks. Beat in 2 tablespoons white sugar per egg white. Continue to beat until egg whites are glossy and hold a firm peak.
3. Adding sugar early in the beating process results in a firmer, finer-textured meringue.
Subscribe to:
Posts (Atom)